November 7, 2012

Halloween Projects (finally)

I know its a week after Halloween but I'm so slow and I am a world class procrastinator!  Anyway, first up is the treats I made up for the grands up north.


The sliding boxes are for the girls and they have necklaces inside of them.  The poison jar is for Jack and its full of candy and then each one of them got a Hershey bar wrapped with a skeleton.  The poison jar is a cut file called Toil and Trouble from SVG cuts.  It was a bear to assemble but once I made this one, the second one was much easier.  I think all the images are cut files from the Silhouette store. The paper is mostly from Echo Park (I think). The skeleton came in pieces that you cut out and put together with brads but I welded them together instead...didn't want to brad 44 of them...LOL...the label on the wrapper was bought from the Silhouette store but I had to do some massive re-working of it to get it to print and cut nice.  The first print and cut was jagged and uneven.  I re-worked the borders around it and once I'd done that, it printed out perfectly and cut exactly on the lines.  The girls loved their boxes...mom took one to work and her co-workers are wanting to buy some but I don't think I want to do it for money....like doing it for fun instead!
I found out, with the Potion Jar cut file. that I had to set my blade pretty high so it just barely scored the score lines.  If not, it actually was cutting through the cardstock and I did not like that look.  I did an ungroup and ungrouped the score lines from the cut lines...fed the cardstock through the cutter twice, once to cut and then once to score, changing the height of my blade for each pass.  The second jar that I made for Gavin came out much better.

This next image is of the Potion Jar I made for Gavin and a card I made for my friend.  I ended up making 44 of the skeleton bars...20 for Gavin's class, 15 for Jerri Ann's co-workers and the rest for me to give to friends of mine.


and a close up of the three projects.
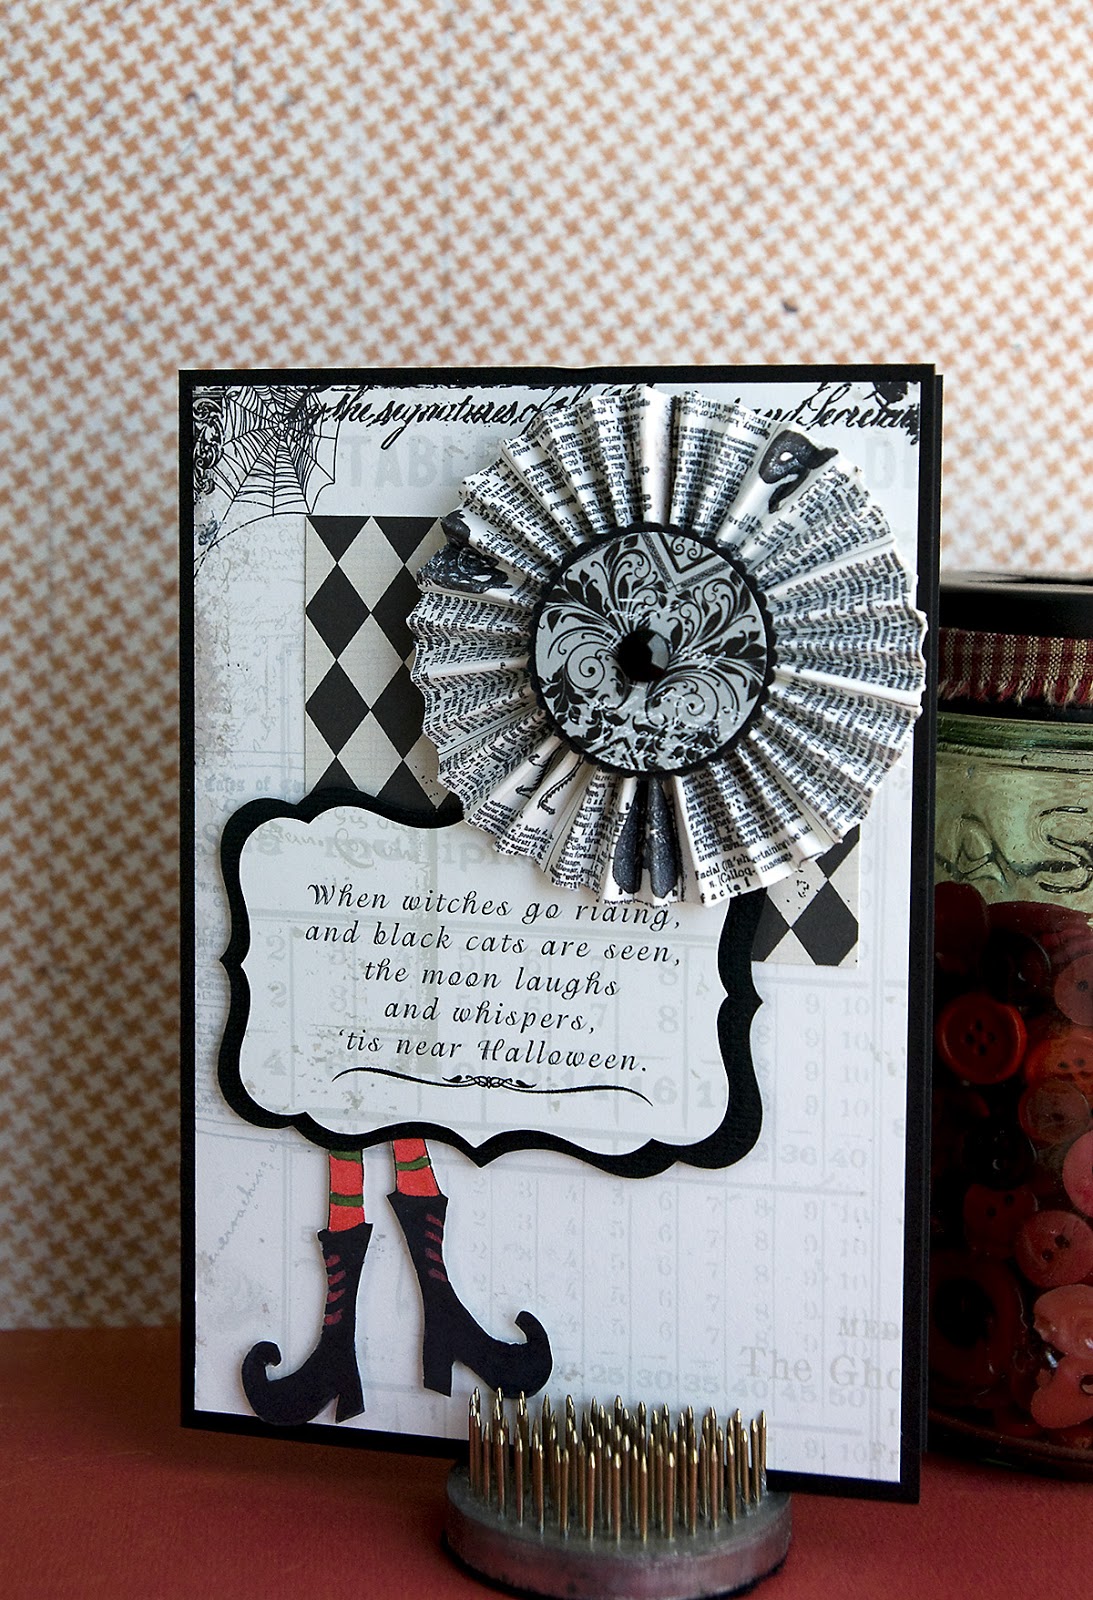

I had to draw my own boots....couldn't find any that I liked. I just drew them on paper and then colored them and cut them out. Don't look real close...my cutting was not too good and my boots are different sizes....LOL..


I made this label with stuff off the internet...bird, the skull was a font and so was the swirl at the bottom.  Printed off on white stock, aged with distress ink and mounted on black.  The spider web was a cut file from the Silhouette store. They were running all their Halloween files at 75¢ so I bought quite a few.  This was one month when I should have paid the monthly fee of 9.99 but didn't!


I welded the skeleton together, then off set him so I could have the black background and ran him though my Xyron to apply adhesive.  Gavin stuck him to the background and he did a really good job!  Used paper from Echo Park the Apothecary Emporium. I had a 6 x 6 pad of this paper but you can buy it from Jessica Sprague as digital plus the kit for the label. This is the label I had to re-work to get it to print and cut properly. 

And this little guy?  Well, it would be Gavin back in the stone age...Jerri Ann and I made the costume.


and last...I needed a birthday gift for my beautician.  She is a cowgirl at heart so I wanted to do something along that line.  I got this idea from Lisa Johnson


I found a horse font, used paper that I printed off from Albums2Remember by Barb called Summer Fun and used a cut file for the stars.  I was running late for my appointment (on her birthday) so had to hurry up and write the inside message by hand...LOL..

That's all for now!  Going for my walk and then work on a birthday card.

....
Pin It!

October 19, 2012

I've whipped out a few cards this week!

I am now ready to get started on some Halloween items.  I had quite a few birthdays and one anniversary to make cards for, so the Halloween got put on the back burner. LOL

This first card is for friends of ours 50th anniversary...wow, that makes me feel so old when our friends are celebrating 50's...I had one heck of a time with this one.  I changed my idea so many times that I finally just cased a card that I liked.  It took me a day and a half to complete this.  Course, since I don't have any stamps and next to no dies, I have to create everything.  
This is the original card...Dawn McVey .
Her colors are much prettier than mine.  I had to print out the plain paper from a color swatch by Pink Petticoat and then designed my banner cut in Silhouette Design Studio. Since the fonts I used were on the desktop and I didn't have SDS installed on it, I couldn't do a print and cut and had to revert back to the way I used to do them on the Cricut...cut a template and then lay my printed piece behind the template and cut again.  Whew...print and cut is SO much easier...LOL
I had the flowered piece in my stash from a kit called Sparkling Spring.  Then I cut the flower petals on the Silhouette.  Finding a font was really tough....that took me the longest and if I remember correctly, the main font was called Respective and I used a flourish from the same font at the end of the T.  The plain text font is called Candara.  The flourish at the bottom is by Katie Pertiet called On the Edge. 


And, again, I used the white gel pen for stitching.  The ribbon and red pearls are from Wal-Mart.  I designed the back of the flower in SDS and you will see it better in the next image.  I'll share the file if you don't mind that its not perfect....I still have a long ways to go before I can get it all symmetrical. 

Ok, this next card was for my baby sister...and it shows the flower that I designed as I designed it...all the same.  I just used it a bit differently above. 


The stripe paper is from The Paper Loft called Easy Breezy. The polka dot is from My Minds Eye called Bloom & Grow and the yellow is from Teresa Collins, Sweet Afternoon.  I got some really good deals at the convention.  The scalloped border was designed by me in SDS as well as the label thing behind the flower. Buttons are from my Wal-mart stash and twine is from PaperTrey Ink. You see one of the only stamps I owe...it was a freebie from my magazine subscription. And yes, I knows its crooked...lol...now you can see why I don't care for stamping.  
I sent this through the US mail.  I put lots of packing tape on the back of the envelope to protect the flower.  Jennifer sent me a message that it arrived intact and beautiful...whew.  I have plans to design a sturdy box to send then in, just haven't got around to it yet.

Ok, I'd better hurry up or you will be bored to death!  This next card is my favorite...I love the color combo.  I ended up making two of these...one for my aunt and one for my SIL...since my aunt lives in Virginian (not WEST), and my SIL lives here, I don't think they will every know that they got the same card...LOL...


The pink paper is from Teresa Collins, Sweet Afternoon. The green and plaid are from Sparkling Spring.  The flower is one I've had forever (always hate to turn loose of some things) and the ribbon...well, I have no idea....but I know I love it and its almost gone now.  :(  The lace came from Michaels and the pink pearls are from the convention.  Yep, I spent a fair amount of money there but the deals were great!  The labels were cut and embossed with Spellbinder dies and the background was a Darcie embossing folder.  

Sorry, this was so long...you know how I like to chatter with my fingers...LOL

....
Pin It!

October 14, 2012

Finally RAIN!

Sorry, no image post today...just wanting to shout out a "Hallelujah" for the much, much needed rain.  We have received almost 2 inches in the last couple of days and its still sprinkling a little right now.  The landscape looks so refreshed!  

I finished up Darby's birthday stuff yesterday and completely forgot to take a shot of the box and necklace I made her.  I delivered it all this morning and was sitting here browsing when it dawned on me that I hadn't posted an image and then it really hit me hard when I realized I hadn't even taken a photo of it.  The box came out really cute....in bright pinks, turquoise and yellows and she loved the necklace.  I had bought a kit from the convention that makes pendants for necklaces and made her a Halloween one.  I told her to come over after Halloween and we would make up some different pendants so she can switch it out.  Etsy is full of  1 inch x 1 inch image files and I've found quite a few I want to make for myself. It's super easy to do and looks great too.  

Anyway, no image post today...just happy for the rain!!

....
Pin It!

October 13, 2012

Halloween Countdown


I made this up for Gavin...the skeleton was a free download from Silhouette and the idea came from here.  I didn't have any 8 x 10 frames but it worked on this 5 x 7 one too.  I used scrapbook paper for the background, cut the wording from paper from Echo Park called Chillingsworth Manor using a font called Feast of Flesh BB and cut the date label out of chalkboard paper that I bought from My Craft Channel. This label was glued to the front of the glass so Gavin can change the numbers with chalk and then I added the Skeleton with glue dots to the outside.  I think he'll like it! 

I had got on quickly to post this and then head out for Gavin's final football game but JA just called and its been cancelled until tomorrow due to rain.  So today, I'll finish up Darby's gifts and work up some more cards.  I hope I'm not boring you with my cards, if so, just tell me and I'll quit posting them.  

...
Pin It!

October 12, 2012

Sympathy Card

 One of my least favorite cards to make but really like how this one turned out.  I had purchased this new die a couple months ago and finally decided to see how she cut...beautiful!  It's a little bit big to be using on cards and I'd love to have some smaller versions of it but really glad I made this purchase.  It's called the Chloe Butterfly die by memorybox.  I think the name was what convinced me that I needed it...LOL....my best friends granddaughter is named Chloe. The embossing folder is a Darcie that I got at the convention, the frilly sentiment die is from Spellbinders called Lacey Ovals.  The fonts are FrancineHMK (a Hallmark font from a card program I have had for years) and Square 721.  All the paper is from Neehah.  

Off to the grocery store and then back here to make a box and bag.

....
Pin It!

October 11, 2012

Bicycle Birthday Card (2nd post today)


If I keep this up, I'd going to HAVE to make me a light box....its too hard taking pictures of the cards with my window light and its always too windy outside. 

Just finished this card up for my future SIL....it has to go in the mail today if she is going to get it by Sat.  I still have to add the saying on the inside but it shouldn't take too long.  I just print it out on a separate sheet of paper and add it will removable tape...that way they can recycle the card if they so desire. Or, they can throw it away and I'll never know!  :~(

All the paper is from the Glitz Happy Travels 6 x 6 pad that I picked up at the convention..the lace and buttons are from my stash.  The book page is from an old book of mine. 

It is SO much prettier in real life!

...
Pin It!

Birthday Card for Older Man


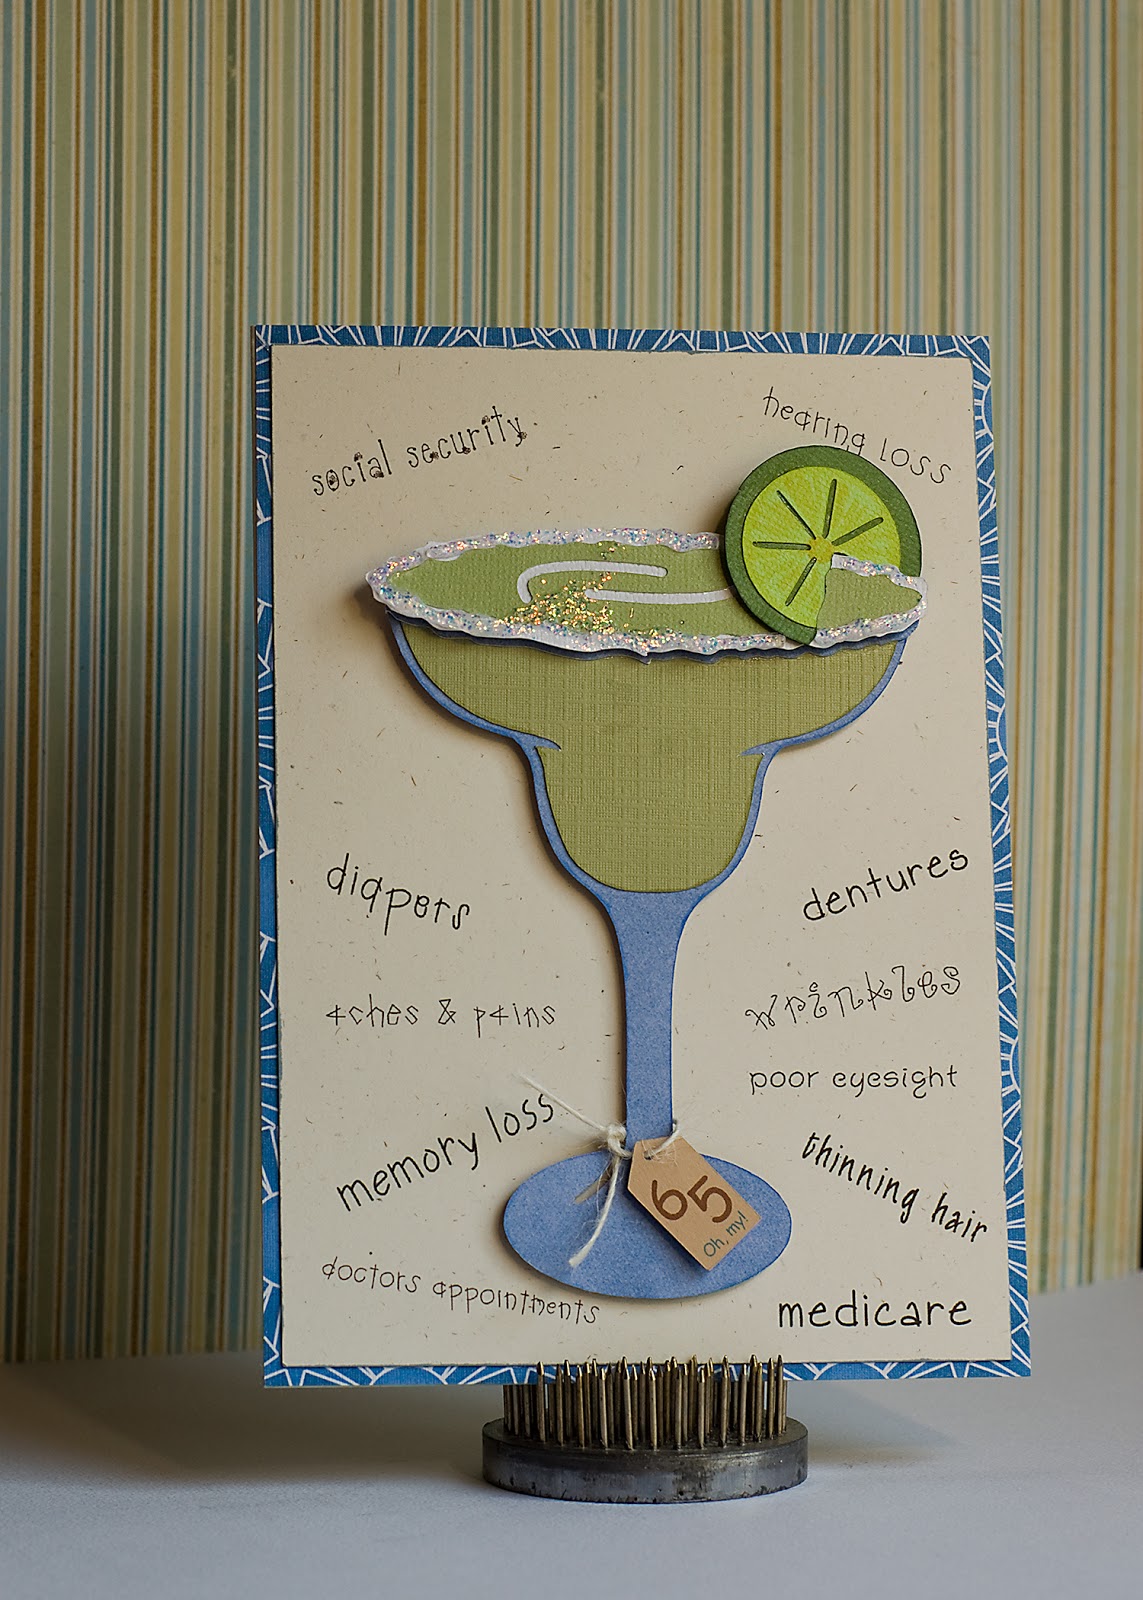
This isn't the loveliest card but quite fitting for a 65 year old man.  My BIL turns 65 today (yep, I'm hand delivering this one) and has signed up for SS and Medicare.  He loves Margarita's and this came to me on my walk yesterday morning.  I found the Margarita cut file on the Silhouette site.  I still have trouble visualizing the finished product on these cut files and have a terrible time picking papers.  All of it is paper I printed off from various kits I have. And yes, I smudged the glitter glue when I was taking a picture of it and didn't even notice till I was uploading the image.  It's too late to do a redo, so he will be getting it as is.  I need to learn patience and let things dry! I thought about using Crystal Lacquer on the glass but have ran out of time.
The inside of the card reads, "Makes you want to order the Monster Margarita, doesn't it?  Happy Birthday."  Our local Mexican restaurant has small, medium and monster sizes.  

I still have 2 more cards to make before the weekend....

....
Pin It!

October 10, 2012

Chick Birthday Card


I can't believe that Darby is 15 today!  It seems like only yesterday she was lying on our living room floor, encased in a snowsuit that rendered her completely motionlessness.  I got this card from my Pinterest Greeting card board.  This is the original card...Lucy Abrams and it was so adorable that I had to recreate it.  I don't like copying cards but knew I loved this one so much, I had to attempt it.  Darby is a pink girl, through and through.  She is a tomboy with pink roots and this little pink chick just fits her.  But, since I'm  not a stamper and own next to no stamps, I had to recreate it with a pencil.  I drew the musical notes in PS and then did a copy/paste to fill the background and then drew the chick with pencil and paper and scanned it it.  I then printed the base card with the outline of the chick on Kraft stock and then printed the chick two more times on the pink paper that I printed off from Pink Petticoat. It was all layered on Sweet Bohemian paper that I printed again from Pink Petticoat and then layered onto some Classic Linen Cover Stock from Neenah. The ribbon was picked up from Micheal's last weekend off their clearance rack.  I've yet to figure out my sewing machine and using it on cards so had to break out the white gel pen again. I think I need heavier thread when I sew on the paper and a smaller needle.  I'll figure it out someday! 

I had a blast at the CK Scrapbook convention this past weekend.  I took a class on coloring with markers and am now the owner of a basic set of Spectrum Noir markers.  They are a cheaper version of the Copic markers and only come in 168 colors but they are as nice as the Copics.  The basic set only has 72 markers so I will slowly add the other colors as I get better at coloring or see I need them.  I'm a long way from being good at it.  I picked up some good buys on paper and embellishments and did a few make and takes to learn a few more techniques, like making flowers, coloring, using glitters, etc.  I can see right now that I need to get a craft budget started so my billfold will be prepared for next year.  

I've got a ton of cards to make this week, so need to get busy! My folks were here all last week and then with the convention, I got way behind.  It took me all day yesterday to make this card, I'm so SLOW.....

....


Pin It!

September 26, 2012

Project Menu Blackboard

Ok...finally!  I got this finished last night.  I got this from Pinterest, of course, as my creative soul is asleep most of the time.  I used to keep a weekly menu on the refrigerator and Bill loved it!  He liked knowing what he was eating for supper each day..why?  I have no idea but when I quit doing it or, heaven forbid, changed a day, he had a fit. So, when I saw this on Pinterest, I decided right then and there, that it was a project I was going to tackle.

I put the blackboard menu on the inside of my pantry door.  I used Valspar Chalkboard paint that I bought from Lowes.  I gave the inside of the door a good sanding to take off the glossy finish and then painted 2 coats of Kilz , a latex stain blocker and primer/sealer.  I gave each coat 24 hours to dry and then started the chalkboard paint application.  The can said 2 coats but I wanted this to last, really last, so I gave it 5 coats with 24 hour dry time between applications.  Was it over kill?  I don't think so. I wanted to use Chalk Ink and after researching the ink, it stated that it wouldn't work good on chalkboard paint because it would leave marks when it was washed off.  Bill wrote a small message to me on the board while I was gone to mom's and on first cleaning, I noticed it left a ghost image of the message.  I then got out my wonderful Awesome cleaner and cleaned it some more...ghost image gone.  I think it is because of the 5 layers of paint...maybe not, but it worked and I'm happy!   As you can see from the image, I taped off the raised edge and painted inside..gave it a nice, framed appearance when completed.


Then I cut my wording on the Silhouette.  Trust me, I learned LOTS of patience with this process....I chose to use the font At Last Greeting and its pretty delicate.  I wasted 5 inches of vinyl before I got the settings right to cut it out.  I was following the information in the software and it was cutting the vinyl but tearing the letters at the same time.  I then lowered my blade to 1, my speed to 2 and my thickness to 9.  Then my patience really had to kick in...it was a B to separate from the backing.  My font size for the days of the week was only 72, that made for some very tiny pieces.  It took me almost 2 hours to go from cut to placement and I came close to throwing in the towel many, many times.  But, it sure looks nice now, don't you think?  Even through I didn't get my spacing good....I was frustrated with the lettering and didn't adjust for spacing very well.  I should have marked it all off but this will work for now...someday, I can always do it again.  I figure my pieces are so tiny that with weekly cleaning of the board, the vinyl will start to come off and need to be replaced anyway.  I'll adjust the spacing then...lol.


My next project is to have some sheet metal cut to fit the other door...I know they make magnet paint but I want it to hold better then the paint does.  So...I'm going to have a piece cut and then paint it with chalkboard paint too.  That way, I can write on it or hang my grocery list with the magnets. 
I am having a BLAST! 
....
Pin It!

September 25, 2012

Window Box Project

This is the next project Bill and I have tackled.  I've always wanted window boxes on these windows and my retirement has made it possible to do a lot of things I've wanted to do but never had the time for. Usually we were both trying to get housework and yard work done on our weekends and never had time for projects. But, since I've retired, I get all the mundane work done during the week so we can play on the weekends.  So, this past weekend, we got these done.


I bought (3) 1 x 6 x 8 feet cedar boards and (4) pre-made wooden brackets from Lowes.  The boxes measure 35 inches in length.  We cut three boards at 35 inches and used screws to form a open ended box.  Then we measured the open ends and cut the boards to fit each end as we went.  There was probably a more effienent way to do this but since Bill and I are not professional carpenters, we just do it how ever it makes sense to us.  Not that it always works out...LOL...sometimes we wonder how our minds think when we finally wake up and see that what we did was stupid...LOL..
Anyway, this way worked for us this time.  I filled the screw holes but as you will see from the pictures, I did a horrible job of it and got in too big of a hurry to paint.  I should have let the filler dry more, filled some more and sanded but its not something that bothers me enough to redo...LOL

I then gave everything two coats of primer and 2 coats of my house trim paint. The hardest part of the whole project was attaching them to the house.  The brackets come with those metal doohickeys that you add your screw and then 'slide' the bracket over the screws...well, let me tell you, we have an awful time getting the screws lined up and spaced correctly so the bracket 'lines' up!  For safety and added strength, we drilled holes in the front of the brackets and added another screw.  I can just see them falling off the wall..LOL

Then, a trip to the green house and this is the final results....I wanted to add mums but the greenhouse didn't have any small enough so went with Rudbeckia, ornamental cabbage and pepper plants. 


and my other window box on the garage....not made by us but will be replaced next year as I get tired of trying to find the mats to fit this one.


Pin It!

September 23, 2012

Just a couple cards

My lovely folks celebrated their 66th wedding anniversary last week, my sister celebrated her 62nd birthday and my brother celebrated his 65th birthday...all in one week!  We've always kidded the folks that Vicki was born on their anniversary and Roger was born 4 days later....they never get the joke!  LOL

Anyway, here is the card I made for mom and dad.

   
The paper is some I bought from My Craft Channel...its called Sweet Afternoon by Teresa Collings and believe it or not, the only part that is from the paper stock is the medallion at the top.  The little banners I cut from the cover sheet page.  They were perfect for the banners that I made and I didn't have to cut up all those paper sheets.  The ribbon is from my stash and I used removable tape to stick it to printer paper and ran it through my HP to print the sentiment.  The doily is from my stash and so are the buttons and rhinestones. The Rustic Cream cardbase and the kraft panel front are both from PaperTrey Inc.

This next card is the birthday card I made for my sister. 


This is from a digital kit called Summer Fun by Albums to Remember designs by Barb.  I printed all the papers off as 8 x 8 sheets and then just went from there.  I made the Happy Birthday panel myself with fonts on my computer and then I used the Silhouette to cut the flowers and leaves that I purchased from the shapes store.  I used the Grand Calibur to cut the scallop on the bottom of the card but if I'd had time, I'd figured out how to do that on the Silhouette too.  The little yellow buttons were picked up at Wal-Mart and the blue ribbon came from Paper Trey Inc.
If you can read the file name of the birthday card, don't laugh...I really can spell but my B won't work in PS if I've got a lot open at one time.  It takes a reboot of the computer to get it to working again and I didn't want to shut down...so the file is called yellowlueirthday...LOL

I've still got two projects to share (told you about the one last week) but neither one is completely done yet.  Hopefully by the end of this week but I'm also cleaning the basement to get ready for the big garage sale on Saturday...which reminds me...need to call the paper tomorrow and put in an ad.

....
Pin It!

September 21, 2012

Halloween Try


I've tried for a couple of days to get this shot and I finally had to take the glass out of the tray because of the reflections. I saw this idea on pinterest done by she wears many hats and really liked it but didn't want to go to that much trouble. 
Do you remember this tray that I had pictures of the Grands in? I cut the shape with my Silhouette cutter out of black scrapbook paper and used the Sunday paper for the background very quick and simple....The hardest part was getting the shot without seeing my orange and pick shirt in it.
Pin It!

September 16, 2012

Kitchen Drawer Dividers

Here you go....finally got around to putting these up on the blog.  I ended up doing 7 drawers and I stayed under 30.00 for the total job.  Much cheaper then those danged ole dividers they sell that do not fit the drawers!  I did not stained my boards...I can always do it later if I begin to feel like it needs to be.  Bill and I made them so that we can take them in and out for cleaning, so I could always rub some stain on them at another time.
We bought trim boards from Lowes...they sell Poplar and Oak in different lengths and widths.  We bought the 2 inch widths and 4 feet lengths.  All except for the big kitchen gadget drawer and we bought 4 inch width for it. We started out gluing them with the Gorilla Glue but we didn't have enough clamps to hold them all together while it dried so Bill started shooting them with small brads with our air nailer.
I didn't get images of all the drawers before I started but you can get the idea by the couple I did take.

This first image is after cutting, assembly and gluing...this one I did all by myself because I decided I wanted another drawer done and Bill was at work.  So, its only glued and we are leaving it that way to see how good the glue is.  I can't run the air nailer cause I can not control it...LOL...shot the wall a couple times!


This is the junk tool drawer....I hated those baskets but couldn't find anything else that would work. This is the before....


...and this is the after....much nicer, don't you think?


and this is my silverware drawer....I had these plastic divider boxes that 'fit' together but as you can see, even then they didn't 'fit' the drawer. I have to keep my vitamins in this drawer so I can 'remember' to take them!
This is the before....

This is the after...I like it SO much better now...


And these are the kitchen gadget and knife drawers.  I didn't get a before image of these but trust me, they were horrible....especially the big deep drawer...I had no idea I had some of the stuff that I found in it!  I had 3 melon ballers....why?  Guess I couldn't find one when I needed it...LOL...


That's all for now....I'll be back at the end of the week...leaving for my folks in the morning.  Still have stuff to share but no time to get it done...BTW...my house is as clean as it has ever been.....got the whole house done except for cleaning the carpets and I'll get it done when I get back home.  AFTER I get the basement cleaned out, that is!

....
Pin It!

September 2, 2012

Sept 1, 2012


It's not every day that I get this ole body down for a birds-eye view of something...I think there were at least two wrecks on the highway from folks trying to figure out what I was doing laying on the ground...LOL
These sprung up over night after our little bit of rain.  We ended up with 8 tenths.....guess that is all we deserved this go around.  30 miles south of here, they got upwards of 6 inches and KC got 5 to 7 inches.  I'm sure our time will be here soon, just hope we can hold out that long. 

Off to a BBQ!  Have a great Labor Day weekend!

....
Pin It!

August 31, 2012

2nd post today!


Another capture from my walk this morning.  I'm going to have to take my tripod with me to get these good and clear.  It wasn't windy this am but my hands shake too much to hold it steady.  It would really be bad if my camera didn't have image stabilization built into the body.  Maybe I should inquire if it could be built into this old body of mine...LOL

And, since I'm on a row...might as well post another shot.  I climbed a fence yesterday to pick some of these to bring home with me.  Too bad they didn't like the vase of water I put them in...they are pretty wilted today.  :(


That's all folks!

.....
Pin It!

Once in a Blue Moon

I'm going to be posting quite a few images today, so be sure and scroll down...I'm on a row for some reason!

I was heading out for my walk this morning and noticed the moon and remembered that the weather man said it was a Blue Moon and we wouldn't see it again until 2015, so I headed back in the house for my camera.  I never realized how fast the moon goes down until I was trying to 'catch' it...LOL...I was walking as fast as my legs would move to see if I could capture it without all the poles and wires in the image but it was sinking way too fast and this was my best shot of all of them.  As you can see, the poles and wires are all still there.  I thought if I could get down to the railroad tracks, I could catch it without any man made junk, should have jumped in the car instead...

A Blue Moon is not Blue...its only called a Blue Moon because it only happens once in a while...thus the phrase, 'Once in a Blue Moon".  It happens when we have two full moons in one month.  Our first full moon was on August 1 and the second was today..August 31st...which just happens to be my 33rd wedding anniversary...guess its a Blue Moon just for Bill and I.

This first image is NOT mine but an awesome capture I found when researching the Blue Moon.  The photographer was Sid Vedula and he took it in Texas on August 1, 2012. 


This is my image...not nearly as dramatic!  I'm right sure no one will be posting and talking about my take on the Blue Moon!  LOL


Now, since I had my trusty camera with me on my walk, I also captured something else that you don't see on an every day occurrence.  This next couple of images are shots of Hurricane Isaac as it breaches our southern skies.  We are suppose to see some of the rain from him by early afternoon but not the deluge of rain that Arkansas and Louisiana received. Worse case scenario, we will get a couple inches....and at a time when we would have welcomed a lot more.  Oh, well, (sigh) we will take what we can get.  I had my wide angle lens but needed a whole lot wider.  I would have loved to have captured the whole view of this encroaching storm.  Just like the weather services were showing the circular shape of the Hurricane, the cloud bank was circular too. The storm is no longer classified as a Hurricane, its not even a Tropical Storm anymore.  It's been downgraded to a Tropical depression, so we will not get the winds out of it. That is a good thing!  I find it intriguing that a Hurricane almost 1000 miles away, can still have some punch left once it comes that far inland. How tiny we are in this vast universe! I feel a great deal of sympathy for those folks in New Orleans....I'm afraid this would have been the last straw for me...I'd be packing up and moving OUT of the flood plain. 

The right side and then the left side...just make believe that they are connected in the middle...LOL.  It really was an awesome sight and I was glad I was out there to see it coming in.  It's completely cloudy now...


And now, since this is my anniversary, its only fitting that I share the card I made for that guy that still makes my heart beat faster.  I used Black and White to keep it toned down for a guy but it still came out a bit too 'pretty'.  He thought it was awesome, of course.  


Paper is from KCompany..red heart is a cut from my Silhouette...(yep, I finally got it out of the box!), the twine is from Wally World, font is Mr. Sheffield (love it) and the sheet music is from the Graphic Fairy.  I used a border punch on it and backed it with red card stock. 


That's all for today...will post some more images this weekend, if I have time!  Bill is on call and if we get rain, he'll have to work...ugh!


...
Pin It!

August 29, 2012

The Wizard of Oz


I warned you about the horrible photo, right?   LOL.....you can't see her very well but that is Amanda on the back row in the yellow circle.  I love watching the little bitty kids perform...they are just too cute!  See the little girl on the right hand side leaning out?  She was the star of the little kids....cute as a button!
Be sure and click on the photo to make it larger...much easier on the eyes...

....
Pin It!

August 28, 2012

A Study in Green


Love this color.... I really think green is my favorite color in any shade.  This was part of the bouquet that Amanda got during her dance recital.  She did a wonderful job of dancing...she is quite a natural.

....
Pin It!

August 27, 2012

The Robins in my Yard


The robins have really enjoyed the birdbath this year.  Since its so dry here, I have to put clean water in it every day.  On this particular day, I was running the sprinkler to give the rose bushes some water and they loved playing in it.  I sat on the deck and watched their antics for quite a while.

....
Pin It!

August 22, 2012

Dancing in the Rain

I sure do wish that were true...LOL....but, alas, we still have not seen any moisture coming from the sky.  I don't know how or why my flowers are doing as good as they are but they all still look good.  They've survived on chlorine water since I put them in the pots.  I've been busy this week doing some belated Spring cleaning.  Since I spent so much time at mom's this past Spring and cleaned so much at her house, I've just not felt like cleaning my own.  But, I finally got started this week.  It will take me all week cause I just get one room done a day.  So far, I've got the craft/laundry room and living room done.  Plan on working on the bedrooms tomorrow. 
Anyway, why cleaning and organizing the craft room, I came across this saying and decided it was time to put it up.  I purchased it when I remodeled the craft room but never got around to putting it up. 
This image makes it look like I put it up crooked but trust me, its straight.  I had to step outside to get a shot of it and with my wide angle lens and side view, it makes the lines look crooked.  This purchase was made long before I purchased a cutting machine.  I gave way too much for it but love it on the wall.  I could have made it a whole lot cheaper...LOL...


....
Pin It!

August 15, 2012

My daughter is 40!


Where did the time go?  It seems like only yesterday that I watched her take her first step.  Then she was driving my car.  Before I knew it she was graduating from high school.  Now, look at her!  She is making me old!!!  Before I turned 21, I didn't think the years would ever go by and now I can't get them to slow down.  I've been retired for 7 months now but it only seems like a few weeks.  I'm not complaining, just wishing my life would slow down just a bit.  I think I know now why folks say you are busier in retirement than you were when you worked...its not busier, its just that the day is gone before you can blink your eyes.  Anyway, enough rambling....here is the birthday card I made her.


Everything was just odds and ends that I had in my stash.  The circles at the bottom were from this lovely book of paper that I got with my Cardmaking and Papercraft magazine.  I think I've told you that its my favorite magazine and it comes from the UK.  I get it once a month and every time it comes with a little something in the package.  I've got quite a few stamps, some glue pens, some water colors and this past month, we got this lovely book of paper by Raspberry Road Designs.  It has 48 different papers in it that I like and will be using quite a bit of it.  Each issue also has a few half sheets inside the magazine too.  
Do you recognize the Happy Birthday banner?  Yep, its the same one I used on other cards.  I printed a whole sheet of them off so I'd have them ready, especially when I've procrastinated too long and need to do the card in a hurry. 
My dictionary and old book pages are pretty fragile so I sprayed them with Triple Thick Gloss Spray to stiffen them up.  I need to look for Matte finish because the gloss makes them a bit too shiny for my taste. 

Next up is the Sliding Message box that I made before.  This was a real pain!  I didn't get it done in time to take to her for her birthday dinner but told her I was making it and she would get it a bit late.  (Since she never remembers my birthday,  she couldn't exactly complain...LOL).  I would have had it done but I had computer issues on Sunday and worked on it till almost 10pm on Sunday night.  I still don't have it fixed right but it works for now.  I was back up at 3am working on the computer again, just to get my internet back.  I had to go online to get the instructions for the box. I now have the instructions printed out...LOL

This uses some more paper from the Raspberry Road paper book and all the cardstock is from PaperTrey Inc.  The butterfly is by K&Company. I used an earring for the knob on this one...it has a big, flat back so I was able to hot glue it to the box and it makes it much studier when pulling on it. I'm still having trouble with the opening of the box...I think I wrap my outer wrap too tight.  I'm going to be making another one in the next day or two and hopefully, it works better.  It's not that this one doesn't work, but you have to be careful when pulling it open or it will break the plastic slide. Sorry...I'm rambling again!  And yes, the butterfly does match the ribbon but for some reason, I can not take a picture and have it in true colors. 


and the inside....


Have a great day!

....
Pin It!

August 12, 2012

Cirsium horridulum Michaux

Otherwise known as road side Purple Thistle.  I love it when its blooming and even when the blooms are gone and all that is left is the 'cob'.  I took this early in the year and just now getting around to sharing it.  The frame is an action that Mark (from Proud Photography) shared with me a few years ago.  I always have a heck of a time running it right.  You have to imput the sizes and I never get it right..or I get the mat color wrong.   Anyway, need to get back to work on Jerri Ann's card...


BTW...check this image out on the practice blog....I LOVE the image size there!!


...
Pin It!

August 9, 2012

Digging up an old Photo


LOL.....maybe my brain just hasn't recuperated from the grands yet but I kind of like how this turned out.  I'm not even sure how I got to this or even why I was leaning toward this look.  This is a jar of Pee Gee hydrangea that is in bloom right now and I spent the better part of the morning trying to get a good shot of it. I'm thinking I need to start fertilizing the Hydrangea's so they have bigger blooms.  They bloom OK, just not too big.  When I go to the nursery, their blooms are as big as my head and I do good to get them to the size of my fist.  Next spring, I'll give them a good dose of fertilizer and see if that helps.


I've got to get my butt in gear and get a card made for Jerri Ann.  She turns 40 on Monday!!!  I can't believe I have a 40 year old daughter, plus a 40 year old son and a 40 year old daughter-in-law...where has the time gone???
.....


Pin It!

Rain....too little, too late..but


This looked great when it started....looked like it might be set in for a long while but alas....it wasn't to be.  We got a whole sum of .2 and we are celebrating getting that!  I went to Macon with Jerri Ann to the doctor around noon yesterday and we drove in pouring down rain from Chillicothe to Macon, over an hour of driving.  We got back home to an empty rain gauge.  I'm thinking I can get by with an inch rain gauge now...no use having a 5 or 6 inch gauge.  That green grass you can see peeking through the rails?  It's cost me a fortune to keep this year.  The sprinklers run every night for 4 hours and its still not lush green but at least its not as brown as the side or back yard.  We have another 30% chance for rain on Sunday but I'm not holding my breath.  At least its a bunch cooler for the next day or two.  Only 84 today and 82 tomorrow with a morning low of 58.  Makes my morning walk so much more pleasant!
We wouldn't be in such dire conditions if we hadn't been super dry last summer, fall and winter and then we only got a few inches in the Spring.  Not nearly enough to build our reserve back up.  Oh, well, I'm sure it will start raining one of these days and probably not shut off.

>>>
Pin It!

Sliding Candy Box


I made this back in June for the gal that does my nails.  I had a awful time figuring out the sliding mechanism but it finally worked out as long as you held your breath right when opening it...LOL....I used this tutorial to make the box...slider box  and here is the You tube video for it too....video
Once its completely assembled you slide the drawer out and the message comes out the other side at the same time.   She loved it!  Something decorative but not too costly for gift giving.  I just filled the drawer with Hershey's nuggets. 

I found that the plastic bags are too easy to stretch and got it to work much better with waxed paper but I was completely out of my awesome Scor Tape and didn't have anything that would stick good to the wax paper.   Thus, I had to use the plastic bag and it didn't open as easily with it.

All the paper is some from my stash...cut mostly on my Cricut with Sure Cuts a Lot.


.....
Pin It!

August 7, 2012

Purple Coneflower 2012


Another shot taken awhile back.  I have more to post, just need to get them edited. 

....
Pin It!

Queen Anne's Lace 2012


I've had this image taken since before the 4th and just now got around to posting it.  For one, I had to move a ton of picture files to the external so I could have room to upload off my camera.  I had 6 compact flash cards full, waiting for space to upload. I still need to do some massive organizing but I did get most of them moved. It took over 36 hours to move them wirelessly...LOL...

It seems like this is the only flower blooming in this desert that we are now residing in.  Still no rain and temps at or in the 100's.  We are beyond burned up!  If this doesn't break, most of the cattle will be sold because of no water left in the ponds.  The corn is already being cut for silage or just mowed down.  The beans are iffy right now....if we get rain and have a late frost, they might produce.  Most of the farmers have their fingers crossed for the bean crop.  Those farmers that have stored corn are going to come out smelling like a rose but those smaller farmers won't be as lucky.  Our friends son doesn't have stored corn but he does carry insurance and that will help them out.

Don't laugh...its been so long since I posted that I had to read the instructions first!


....
Pin It!

July 30, 2012

One of my favorite summer dishes


This is one of my favorite things to take to a covered dish affair in the summer. I always have to take a few copies of the recipe. If you like squash you must give this a try.
Pin It!

July 19, 2012

In the kitchen with my son


I told Neal the other day that I had never made salsa so today he came down and we made salsa together. Well, he made most of it and I just ate and snapped some pictures. This stuff is so good I could eat it with a spoon. This just has tomatoes,onions, peppers,cilantro in it with salt, pepper, sugar to taste.

It was fun being in the kitchen with Neal, I think he loves to cook.                          
Pin It!

LinkWithin

Related Posts Plugin for WordPress, Blogger...