March 12, 2014

Only in Missouri

It was 68 degrees yesterday afternoon...73 the day before and last night we had high winds, rain, sheet and then snow....that is one thing this state is completely certain of...if you don't like our weather, just hang around a bit, it WILL change!  LOL....

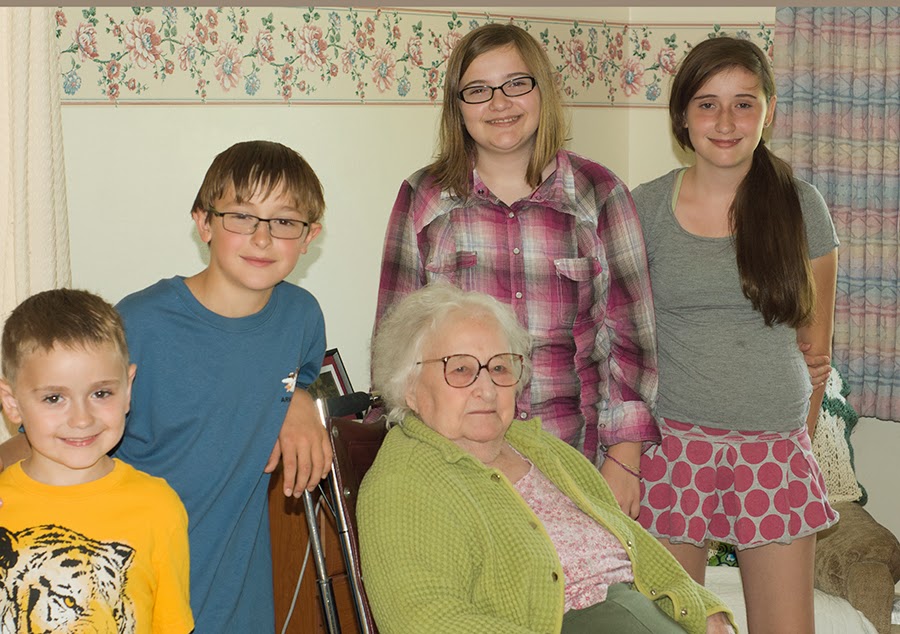
So, I was sorting through some pictures and came across this one....figure I had it ready for the blog, but never posted it...if I did, I guess we will just have to re-visit it...LOL...


Enjoy!


Pin It!

March 11, 2014

The Last of the Cards...now to get creating again!

This is it...the last of the cards I've made to date....I do have a project in the works but it will be a day or two before its completed...

The first two cards used the same papers, just a bit of changing up of the layering.  I'm not sure which I like better...the first or the second one.  I made the first one for my mom and was never completely satisfied with how it was turning out so when I made the second one for Rox, I changed up the papers a bit and really think I like it the best.  Not real, real happy with either of them.  It's funny how sometimes I absolutely love how a card turns out and other times I just can't put my finger on what I don't like and what needs to be changed.

Anyway, I used paper from Sweet Shoppe Designs called Free Spirit. The newsprint paper was in my patterns folder but not sure who the designer was. I download lots of free papers and those get separated from their designers pretty often.  I had purchased these charms by Tim Holtz a while back and the hummingbird was just perfect for this card...Mom loves her hummingbirds!  The flower cluster in the circle is by Katie Pertiet and the birdcage is from the Silhouette Store.  The tiny butterflies came in a kit and luckily, were the perfect size!  I made my card-base out of Rustic Creme from Papertrey Ink and then made the layers to add to the top by resizing the circle cut out on each layer...I wanted a matted picture frame look.  This was harder than you would think...LOL...or for me it was.  The flower cluster and the birdcage (with drop shadow) were printed onto the pink layer of paper, which meant I had to keep it white around the flower cluster and still keep it lined up with each additional circle layer.  As you can see, it worked but it took a few cuts to get it there.  The sentiment tag is one I made for Maxine's birthday tag assortment.  The font is Great Vibes.  A few pink pearls to the bottom and a bit of distress ink to the edges and a pink satin bow. 


On this one I changed the sentiment to be used as a get well or thinking of you type card.  I left the scallop circle off completely but I added cut out circles to the border stripe. This was easily done in SDE by opening the border strip, adding a circle under the first scallop and then doing a copy/paste until I had enough circles for every scallop...then I positioned the first circle directly under the left side scallop and positioned the right circle directly under the right side scallop.  Opened up the alignment tool and selected space horizontally...this put the circles directly under each of the scallops.  I then selected all the circles and did a duplicate below and lined that second set up above the bottom scallops. Selected all the circles and the border strip, right clicked and made compound path...perfect!


Again, I used the same papers from the Free Spirit kit but used a cream layer on the bottom, the green in the middle and the rose pattern on top.  I cut the border strip out of green (used the eye dropper tool to select a green out of the green pattern layer) and then filled the top border layer with a pink stripe out of the kit.  I sewed this on with cream colored thread.  I did not distress any on this card...I wanted to sew the white on the sentiment tag but didn't figure I could follow the design so just added some white fake stitching.  The butterflies were cut out of some glitter cardstock and doubled up with foam dots and added to the birdcage.  The bow is seam binding with a pearl glued to the center and I added a few small pearls around on the floral background.  The Rainbow font is Mardian Demo and the rest is just plain Arial.  

And the last one is from a card I shared before...the bedspread inspiration...I had the background left over.  It didn't emboss as well as I would have liked so I ended up printing out another one and re-embossing but I hated to throw this away.  So...I decided to use it for a thank you card.  I had watched this video on stamping a butterfly onto pattern paper and then cutting it out and I liked the look...just don't have any stamps to do it with...LOL...so, I found a butterfly cut file that I liked, gave it a black fill and then did a offset and deleted all the inside stuff. I know this doesn't make sense to you, but when you do an offset to something like this butterfly, it will off set all the 'holes' and around the outside edge.  I only wanted the base of the butterfly, not with all the 'holes', so I erased all the stuff on the inside.  Oh, wow...why can't I say what I did and make sense?  I need to do a pic tutorial so this makes sense.  Anyway, I filled the offset with purple, grouped both the black filled butterfly and the purple offset and told the program to just cut the outer edge.  I did a print and cut and came up with this butterfly....basically a stamped look on purple card stock...I couldn't find any purple pattern paper that I thought looked good behind the 'fake' stamp.  I then just added some glitter glue and let it dry.  Popped it up on the background, added a pretty purple ribbon and a Thank you tag.  I rounded the corners, layered it on black and then on the card base.  I love the black/gray white with the splash of color. Oh, yeah, notice that font?  I really like that Mrs. Blackfort!


That's all for now!  


Pin It!

March 9, 2014

Simple Banana Pudding


Simple Banana Pudding I whipped up for dinner last night.

2 sheets of graham crackers
1 4 oz. box of cook & serve banana pudding
2/3 cup instant nonfat dry milk
2 cups water
Fat Free Cool Whip

Crush graham crackers and divide between 4 dishes. Mix dry milk & water add to pudding mix and cook as directed on box. Pour over graham crackers. Chill .
Add Cool Whip before serving.
Quick and simple but it sure was good.
Pin It!

March 7, 2014

Almost done....

with the last of the cards....except I just finished up three this week and still need to photograph them.  I'll post those another day! 

This first card was done for my son-in-law...I cased this card almost exactly!  Too bad I can't find the image again so I can post a link...but I will come across it some day and update...anyway, she had used stamps to make her card...me, I don't own any so I had to do it on the computer and my software of choice was Silhouette Designer Edition...love this program!  I first set up my card base and the layer to go on top and chose the font, Aharoni. I wanted a nice even font and this one worked perfectly.  I first typed my first line, adjusted the spacing and then just did a copy/paste for the next 4 lines.  I chose a dark gray for the color and selected no cut in the cut window.  All I wanted was to print this.  I set my paper size to 5 x 7 in the software and my printer program and used AC Gray cardstock and sent it to the printer...I love this feature.  I just trimmed it a bit on all four sides once it had printed so it would measure 4.5 x 6.5 (I like to make my card bases to 4.75 x 6.75).  I then went back to my software and added two stars on top of my font and lined then up with the type.  Then I just selected the three rows of fonts that were 'underneath' the star and did a copy/paste on 'top' of the star.  I selected all three of the copied rolls of text and the star and moved them off to the side of my card layer so I could work with them.  I did a rasterize of the text and the ungrouped them. This way I could give each letter a color fill. I deleted any letters that were 'outside' the star and then colored each letter that was 'inside' the star...turned on my registration marks, set my size to 5 x 7 and sent it to the printer.  Once it printed, I loaded it in the Silhouette and cut the stars (BTW...you turn off cut on the colored letters, you only want to print them).  Since I wanted my stars to be 'thicker', I went back and cut 2 more stars for each size and then glued them together to form my 'fake' chipboard element.  I then lined up my stars to match my gray printed font and stuck it down with glue dots.  Finished it all up by layering it on top of my cardbase. 


Now...I just happened to take some images while I was making this next card and decided to include them so you can see how I design the card in the software and then cut them out...sorry, I didn't get a shot as they were coming out of the printer but you understand that part..right?  LOL....just make sure to turn registration marks on so they print along with your cut outs. The first image is my design laid out on my cutting mat in the Silhouette Designer Edition.  As you can see, I try (don't always remember) to keep a layered version of the finished card with my file so that I can remember how I put it all together if I want to make another one. The second image shows the process of cutting the files out once I've printed it off.  I always do an offset to all of my images or just put a rectangle behind them in the same color with no cut set so that when it cuts, there is no white showing around the edges. My Cameo does an awesome job 98% of the time cutting right along the line but this way I never have to worry about the other 2% of the time...LOL....Once I have it cut (I almost always use AC card stock as it cuts like butter in the machine), then I use my Spectrum markers to 'color' the edges...hate seeing that white edge. I've got to get some use out of those expensive markers...LOL..

Everything is done in the program...I fill my shapes and add my sentiment.  I would die if my cutter quit!  I can't imagine cutting with scissors like I used to!  Remember the 100 boxes I made for Jerri Ann's wedding and cut by hand...


My card was made using a kit called Little Charmer by Laurie Ann HGD and some paper from Beachy Keen by Erica Zane...the kite paper (Beachy Keen) matched perfectly with the flowers from Little Charmer.  I just used the eye dropper tool to match my solid images.  I used a cut file called Lattice Screen from the online store. Used the offset tool to add a white sticker border around the flowers and then cut them and layered them on top of the lattice and added buttons and twice.  All of the paper is layered on a kraft card base and rounded one corner.  Used colored pens for my fake stitching and added a few gems. 


Last one....a birthday card for my niece.  I used paper from Birthday Celebration...a collab by quite a few artist...Laurie Ann being one of them...I love her designs!  I used her music sheet to the background and then just drew some funky circles and used the sketch tool in the program to give it the hand drawn pen look and made the line color white...spaced them around the edges of the background.  I then made my cardbase by adding a scallop edge to the right side and welding it to my card front...I printed the inside sentiment and my logo on the back before I sent it to the Cameo to cut the scallop edge.  I'm sure there would have been an easier way to add the color to that edge but this was the only way I could figure it out. I then cut a scallop edge, identical to my scallop edge on my card and filled it with the turquoise color, cut it out and glued it on top of the card base edge.  I then cut the pink strip, added glitter by putting double stick tape down the front and then adhering the glitter to the tape.  Then I layered the backgound to the front of the cardbase and covered my seam between the background and the turquoise border with the pink glittered border. The wordart and tag were both part of the digital kit and I just traced them and cut them with the Cameo as well as the birthday cake. I did cut two of the birthday cakes and layered them with foam dots. The first cake is glued directly to the background, then the tag sentiment is added with foam dots and then the second cake is added on top of that with higher foam dots.  A few pearls, some fake white stitching and some glitter to the cake and popped on the Happy Birthday...super cute!


I hope you've enjoyed today's post! I hope to post the final three next week....need to get some groceries bought and go for my walk.


Pin It!

March 6, 2014

Cards, cards and more Cards!

This first card I made for the little man's best friend...he is also the sweetest kid I think I know. Whenever Gavin comes here, Ethan usually comes a day or two too....he loves to cook, so we usually get one meal out of him...he remembered my birthday, so I had to make him a special card.

The background paper is by Yellow Lemon and the kit is called Number 1...appropriate, don't you think?  LOL

I got the frame, scallop circle, star and banner from the Silhouette Store and just added some digital paper files and cut them out.  On the number 13, I added Glossy Accents and red glitter.  He thought it was way cool and sent me a Thank you text.  


This next one was a birthday card for a longtime friend...The kit is by Erica Zane called BeachyKeen and I've used it before...I love the soft color combination.  The butterflies are a cut file and I just used the Print n Cut feature of SDE.  I added a scallop edge to two different colors of border and then made a butterfly cutout, layered them both together and then cut a double cut of the three butterflies out of different pattern paper and layered them on top of each other and then used pop dots to put them inside the cutout.  Added some pearls along the edge for interest and some colored rhinestones and twine.  
I absolutely love the Print n Cut feature of this program...saves on tons of ink!
The font is SplendidOrnamenty.


Moving on.....this next card was made for a dear, dear friend...one that I've known since our kids were little!  I had got this magazine (can't even remember what it is called) and they had this bedspread layout.  I wish I still had the magazine so I could show you how I came up with this card but I don't.  The bedspread was sewn in columns...does that make sense?  Like you can see in my card...the embossing on the background..and then it had the flowers printed in black/gray with a few colored butterflies sprinkled off and on over the spread..I just loved the look and thought it would make a neat card.  Again, I used SDE with the Print n cut feature....the beautiful frame was a freebie SVG file I got a long, long time ago.....when I got my first Cricut.   I used some flower brushes and music sheets to design my background and then printed it off and ran it through my column embossing folder but it doesn't show up very good in this image.  It's layered on black cardstock and then added to the front of some apricot card stock. Added some twine, pearls to the butterflies and some wording art.  Added an envelope liner to finish it all off.


This is the beginning of the Valentine projects.  These were made for the grands up north...nothing too fancy or too big as postage is getting too high....I just made some boxes I bought from the Silhouette Store, used the print n Cut to fill the shapes and cut them all out.  The paper used was Sweet Valentine by Sassy Designs.  I also used cut files from Miss Kate Kutables.  It takes me forever to get my papers chosen and then figure out how to layer these up...the monster drove me nuts before I figured it out...LOL....added some ribbon, twine and sentiment tags. Sorry the picture isn't the best...I was really running late with these and had to take a picture quick and didn't realize I should have changed my aperture until after they were shipped north. I filled them with treats and money....


And these were made for Gavin, Darby and Tracer...they were hand delivered so I could go a bit larger on projects...LOL...the files are all by the extremely talented Mary from SVG cuts....her cut files are so perfect...unless I just really screw up with my alignment the projects come out perfect.  Darby and Tracer still talk about their boots!  I know Darby is getting too big for this kind of stuff but I make them anyway...figure she can throw them out if she wants too. 
The paper for Darby's boot is Giddy Up by Carta Bella, designed by Samantha Walker.  Tracers boot?  I have no idea....I'm thinking it was paper I had in my stash...or some I'd printed off a long time ago?  The blue is AC Cardstock...I do know that.  If I come across it, I'll update the post.  The guitar was made for Gavin...it was so cute!  I can see me doing this with the grands this summer.  The top of the guitar comes off and its a box...filled with Snickers and a small amount of money.  I just used brown AC cardstock for all of it except for the sound board panel and it was made using some more pattern paper that I can't find at the moment....update when I do.  This is the biggest reason I need to add notes!  I can't remember what I did yesterday, let alone 6 months later!  I also used some glitter cardstock that I had for the ring....just to give it a bit of a Valentine look but not enough that he couldn't display it all year.  I'm sure him and Dad fought over the candy!


This is just another shot of the guitar....I liked this prospective!


Moving on to the last of the Valentine stuff...a very simple card for a friend....some white cardstock, a white swirl cutout and a red heart with a bit of glitter...simple, simple, simple!


I'm going to call it quits for today...I'll post the rest tomorrow!

Enjoy!


Pin It!

March 4, 2014

Very Late 2013 Halloween or Super Early 2014 Halloween!

LOL.....I did make these for the grands this past Halloween but we will just pretend that I'm super organized and already ready for Halloween 2014....LOL...not EVER going to happen.  If I can't procrastinate, I can't wrap my mind around any ideas! Just like my mothers birthday card...I've had it listed on the top of my TO DO list for 2 weeks now...still haven't got it even started and I did so want to get it done in advance...

Anyway, here we go....I'm sure I won't remember where all the stuff came from but will do my best. 

First up is Ghoul Friends and yes, I did spell it incorrectly on the tag....ROTFLMBO.....why do I notice it now?  It's been delivered a long, long time!  That is what I get for using a font that is hard to read.....maybe the recipient didn't notice!  LOL...The font is A Charming Font.

I used some black star patterned paper from My Mind's Eye and then all the banner prints are from Echo Park and I utilized the print n cut feature.  I sewed the banner pieces on with my sewing machine with black thread. The witch's are a download from the Silhouette store and the buttons are from my stash and since I have them from lots of different places, I wouldn't have a clue who manufactured them...LOL...the white background paper is from Papertrey Ink and one of my favorite cardstocks to use...I just love the specks in it.

This was one of my favorite cards, I just really liked how the green contrasted with the black.  I had seen similar cards like this on Pinterest and just had to see if I could recreate them. 


Next up...another Pinterest card I came across...Shari Carrol.  I like how she made the card base with the oval top and went about creating my own card base in SDE...it wasn't as easy as it looked...LOL..the paper I used was from Echo Park again and the cardstock was just AC cardstock in black. I downloaded the witch, bat, and house from the Silhouette Online store and cut them out of the black paper and then ran the house though an embossing folder to make it look like brick.  The moon is printed on some cream stock and then a double sided adhesive paper is cut again and adhered to the front and then I covered that with glitter.  The fence is another cut file and the BOO is a font that I cut on the Cameo and then added crystal lacquer on to give it dimension and shine.  Buttons to finish it off. 


Card number three....this one went to Jack...I just LOVED that little ghost on the type paper. Too bad I don't remember where the paper came from...I thought it was in my patterns in SDE but I can't find it and I'm thinking now that it was just some paper I had on hand and not digital. The Halloween word art paper is in the pattern folder but unfortunately, I don't have the designer name with it.
I cut the scallop border in SDE.  I drew the ghost and then used a banner tag and used the print n cut feature for both of them.  This was the first time I have used the pen tool in the program and liked how it looked on the ghost.  The font used is Janda Stylish Script and I just broke it apart and added some eyes that I drew for the O's.  Cut a few more shapes and layered it all up...added rhinestones and some colorful buttons.  Too cute!

UPDATE:  I found the paper...its also by My Mind's Eye and it's from the same kit, Mischievous.  Whew....that's how things get done around here...look for something else and then I'll find the first thing I was looking for...LOL

Whew....no wonder I haven't done this till now..it takes so much time!  Of course, if I'd do it as soon as I finished making a card I would have more information and could give better credit.  This next card is my least favorite but I needed something a bit less girly or kiddie for my big man, Gavin.  I cut the spiderweb and the skeleton and just added them to the card along with a fuzzy spider I had in my elements drawer.  Made an October 31 tag, a bit of stitching and glitter spray to the web and called it done.  That skeleton is a bite to cut out....I'm finding out with most of the cut files, they cut great if you cut them large but when you downsize them for a card front, the little delicate parts (like the teeth) are way too small to cut.  I ended up going in and 'resizing' the teeth larger just so you could tell the guy had teeth!  If you remember it, this is the same skeleton that I used last year when I made Gavin's count down to Halloween picture.  He didn't even trick or treat this year...getting too big....if he only knew how hard that is for grandma, he'd trick or treat till he was old and gray...LOL


Are you getting bored?  I've got a couple more to go.  This one was the easiest to do...it is all from a paper kit that I got at the craft fair.  It's My Minds' Eye called Mischievous.  The raggedy Anne was fussy cut by me and then the rest were actual cutouts from the kit...the pumpkins, photo corners, arrow sign (I added the Trick or Treat with a white gel pen) and buttons all came from the kit.  I did cut the Polaroid frame out with the Cameo.  Layered it all up, added some black stitching, some colorful twine and popped up the doll and buttons.  Super easy!

.

I lied...I've got two more to go....I must have been having fun last Halloween or maybe I actually got around early and had lots more time...LOL...I used a bit more from some Halloween kits I had..the background paper is My Mind's Eye called Blackbird.  The border on top and the tag are from My Mind's Eye called Haunted.  And that type paper came from My Mind's Eye from the Mischievous kit.
I cut the moon out of orange paper this time and covered it with moon dust...something like glitter only really fine.  I cut the crows, tree, and spider web on the Cameo.  Added a banner behind the greeting tag, some black stitching and layered it all up on black cardstock. 


Last one...aren't you glad to see this come to an end?  LOL....its not really the end..just the end of today's shares.  I've still got Valentine stuff to share and a few more cards.   

This one is my absolute favorite...did I say that already?  Oh heck..I just liked them all!  I think Halloween is a fun time to make things...I love the colors!  

Again, I used that word art paper that I can't find the designer for.  I teamed it up with some lime green and the combination is just too cute!  The monster is by Samantha Walker and I purchased it off the Silhouette Online Store
It was easy to cut out and assemble but I just HAD to add the wiggly eyes...they just seemed to fit the image!  Cut a layered tag and then some a border with pinked edges and a white border that I ran through a chicken wire embossing folder.  Layered onto black AC cardstock.  Cute, Cute Cute...


Well, that's all folks!  Until next time!

Enjoy!

Pin It!

March 2, 2014

Sunday Morning Card Share

Worked up a few more cards to share....these were done back in the fall last year and just now getting around to posting them...after these I've got last years Halloween cards to post and then I think I'll be back up to date...well, almost!  LOL

I made this card for my newest sister in law...she is a bit younger then me but still from the Rock n roll era and I thought she'd like this.  She is also big on collecting antiques.

This was all from a kit I bought from Robin Sampson called Retro Diner.  I took all the images into Silhouette Designer Edition and traced them to be used with the Print n Cut feature.  After cutting, I layered it all up with pop dots and added some black buttons from my stash and some twine.  I added Crystal Laquer to the records and the malt glass to give it the shine it really deserves and also a bit around the juke box player and I used a dark pink colored marker to add layers to the poodle skirt.  I thought it turned out extremely cute and was easy to do....I like bright colors so this was right up my alley.

Next up was my sisters birthday card...nothing fancy, just flowers, a fence and a butterfly I had picked up the last time I was in Michaels. 


The ribbon was from Wal-Mart, the butterfly was by Martha Stewart and the flowers were drawn by me and cut on the Cameo.  I drew the leaves in the Silhouette Design Edition program and just left them as printable and not cutable...they printed out with my greeting when I printed the card layer and then I added a bit of white gel pen to highlight the tops of the leaves.  The flower centers are wiggly eyes that I painted with pearl white fingernail polish and attached with glue dots.  The paper is all AC cardstock. The fence was a cut file I downloaded from the online store.

Ok...last one for this session...another birthday card I created in SDE.


I have lots of embossing folders and never think to use them as much as I should. You would think I would because I love the look...something else I don't think about often enough is rounding my corners.
The embossing folder is a Darice.  The paper and butterfly came from Robin Sampson too and the kit is called Pleasure.  I just filled my shapes, traced the butterfly and used the Print n Cut feature in SDE. I do not remember where I got the Happy Birthday sentiment...I'm thinking it came from Miss Kate Kutables but not sure.  Added some music to the background before I embossed it and rounded the corners...pretty easy.  You can't see it in this picture, but I added glitter to the butterfly. I thought the sentiment tag would look good with turquoise on the edge but it didn't turn out too good...looks pretty sloppy to me but as usual, was running late and didn't have the time for a re-do...I'll fix it the next time I make this card..LOL

UPDATE:  I figured out the music background on this card, as well as the Happy Birthday sentiment. The paper was by LaurieAnnHGD and came in the After Five Designs Birthday Celebration Digital kit. I originally thought the greeting came from Miss Kate Kutables but it didn't.  It was from this same kit, Birthday Celebration, and it was designed by tborges.  This collection was made by 11 different designers.  It's hard to keep track this way...

This isn't a card but we got to enjoy some color in our landscape right after Christmas..in fact, we were taking down Christmas lights on a fairly warm winter day when this fellow decided to bless us with some beautiful sky color....too bad he was moving so fast and I didn't have time to change the lens on my camera.


Spring will be here some day!

Enjoy!

>>>
Pin It!

February 27, 2014

Granny Smith's

Good afternoon!  I spent a few moments in the kitchen this morning.  I had some Granny Smith's that were just begging to be put into a pie, so I put them in two pies!  LOL...they are not pretty but they sure did smell exceptionally good baking.  My mom picked up 2 pie pans for me at the flea market. All I've been able to find were 9 inch pans and this recipe calls for an 8 inch pie plate and trust me, an 8 inch pie plate is about as far as you can make the pie crust go once you divide it in half. The first pie I made like the directions and made a two crust but on this second pie, I decided to attempt a lattice top...don't laugh....it is not very pretty!  According to the directions, you roll the pie dough out onto wax paper but I found it much easier to use Parchment paper.  The dough stuck to the wax paper but peeled right off the parchment.  So, its been noted on my recipe to use parchment paper instead of wax. Maybe parchment paper wasn't as readily available when Joanna made this recipe but its definitely better to use then the wax paper was.

Like I said, its not pretty!  Maybe next time I will do a better job with the lattice...I realized after I cut it that I should have cut it all the same width and I made the mistake of laying the first way all on the top of the pie and then it got warmed up by the hot filling and I couldn't 'pick' it up to weave...but I'm sure Bill and I will eat it anyway!  We aren't too particular on looks as long as it taste great! This pie plate was a bit too deep but it was the 8 inch size, thus the reason why I attempted the lattice top...just divided the crust about 75/25 instead of 50/50, put the larger piece in the bottom and used the smaller half for the lattice top.

 Here is the recipe if anyone wants it:

Old Fashioned Apple Pie (a Joanna Lund recipe)

1 Pillsbury refrigerated unbaked 9-inch piecrust
1 (4-serving) package JELL-O sugar-free vanilla cook-n-serve pudding mix
1/2 cup unsweetened apple juice
1/2 cup water
1 teaspoon Jo's Apple Pie Spice (or any reputable apple pie spice)
2 Tablespoons Brown Sugar Twin (I used Splenda Brown Sugar blend)
3 1/2 cups (3 large) cored, peeled and sliced cooking apples

Preheat oven to 425 degrees.  Meanwhile, let pie crust set at room temperature for 10 minutes. In a large saucepan, combine dry pudding mix, apple juice, and water. Stir in JO's Apple Pie Spice and Brown sugar Twin. Add apples. Mix well to combine. Cook over medium heat for 5 minutes or until the apples start to soften, stirring often.  Remove from heat.  Place saucepan on a wire rack and let cool for 5 minutes. Cut the pie crust in half. Gently roll each half into a ball.  Wipe counter with a wet cloth and place a sheet of waxed paper over damp spot. Place one of the balls on the waxed paper. Cover with another piece of waxed paper and roll out into a 9-inch circle, with rolling pin. Carefully remove waxed paper from one side and place crust into an 8-inch pie plate. Remove other piece of waxed paper. Evenly spoon apple mixture into pie crust. Repeat process of rolling out remaining pie crust half. Place second crust over top of pie and flute edges. Make about 8 slashes with a knife to allow steam to escape. Bake for 10 minutes. Reduce heat to 350 degrees and continue baking for 30 to 35 minutes. Place pie plate on a wire rack and allow to cool completely.  Cut into 8 servings

8 Servings:
167 Calories, 7g Fat, 1g Pr, 25g Ca, 160mg So, 8mg Cl, 1g Fi.

And yes, I realize that those red apples are not Granny Smiths.....unfortunately, all the Granny's went in the pie and when I decided to take a picture, all I had left were the Red Delicious!
And, since I was taking pictures in the kitchen, I decided to take one of the newly remodeled area.  The dishwasher 'finally' made it in yesterday and Bill and I got it installed.  I haven't ran it yet to see how it works. It looks like I might be able to fit more in it than I could my old one.  BTW...did I tell you that I bought two more door shelves for the refrigerator?  Yep, we took the "Beverage Cooler" out and added two more shelves so I can put more stuff on the door.  It still seems like its smaller than the old refrigerator but I'm starting to adjust to it.  Next to replace will be the microwave and the range but that is for another year...maybe next year!  We need to get to work on Bill's bathroom and I'd like new carpeting in the family room...

At this time, we added new Armstrong Luxe Vinyl Plank flooring, bead-board to the back-splash, a new faucet, refrigerator and dishwasher.  I'm looking for new knobs for the cabinets so they match the stainless better.  I know the gold on the ceiling fan should be changed too but I have three of these in this room and hate to change them all....have thought about bronze or nickle spray paint but I'm sure I will hear lots of complaining from Bill when I ask him to take them down to paint...maybe the next person that owns this home can change them out...I'll just do the cabinet pulls. I really, really love my floor even if it does need sweeping every day.  All in all, I'm happy with this minor remodel!  I'm sure the young gals are appalled at the OAK cabinets but no amount of pressure will get me to paint over that lovely wood!  Some day...new counter tops too! I'll just add that to next years list too...  ;)


Have a GREAT day!

>>>
Pin It!

February 21, 2014

Cards, Cards and more Cards.....

I knew I had gotten behind on posting the cards I make but didn't realize I'd got this far behind...I'll be sharing 15 cards today, as long as Blogger allows me to post that many in one post but if not, I guess it will have to be in more than one...

First up is a Birthday card. This was made way back the first of 2013 so trying to remember the particulars is next to impossible for this ole brain...LOL...I know the card stock is from Papertrey Ink and I drew the flowers and the greenery. I'm thinking the dandelion was a brush but not sure where I got it and the butterfly was cut on the Silhouette and I'm sure it and the label were files from the Silhouette Store...I wish I would remember to add a note to all my files but I don't!  Anyway, this was designed completely in the Silhouette software program and cut on the Cameo.


Next up....another birthday card, this one for my younger sister.  It was pretty simple and easy to make...probably had little time to do it in, is my guess...LOL...I used an embossing folder on the green panel, cut the butterflies on the cameo and then made the round tag and cut out of some paper I had on hand at the time.  Layered it up and added a ribbon bow...easy, easy, easy!


Are you bored yet?   Only 13 more to go!  This was another birthday card that I wanted to try out the technique of cutting out the front panel with a butterfly cut file and then cutting it again with pattern paper to layer it on top of the cutout.  I embossed the panel and added some pink cardstock underneath.  Rotated the sentiment down the side and then did a trace on the bicycle and did a print and cut with the Cameo.  After it was all cut out. I added Crystal lacquer to the metal part of the bicycle to make it shiny and then added a bit more to the flowers in the basket.  The bicycle file and papers are from Free Spirit by Krystal Hartley and Laurie Ann.  I really liked how this one turned out! I've added another image so you can see how I did the inside. 


Ok. on to card number 4!  Whew....another birthday...I don't make much of anything else!  This too used a digital kit that I traced and then did a print and cut...the dollies and bird on the vine came from this kit but at the moment I can not find it. The butterfly came from a kit by Lauri Ann called April Showers.  I'm thinking she is the artist for the bird too but will have to check on that more.  The dollies and bird are printed onto the scallop panel and then I traced just the bird and cut it again out of the teal stock and layered it on top.  Added some pretty dotted paper, teal ribbon and a wooden button.  I'm sure the saying came from the same kit as the dollies...


Oh, my....this is starting to bore me...I can imagine what it is doing to you...at least its not a birthday card...its a Father's Day card instead...I really like using the Cameo to cut out panels and then layer behind them.  It just adds something special to the card.  This is one of the first times I actually thought about rounding my corners.  I usually forget until I've got it all layered up and then you can't use the corner rounder.  The stars were something I picked up in the clearance aisle at Wally World.  It's funny about that font in my greeting....I was just typing in the greeting and the phone rang...I answered, talked for quite a while and came back to the card and printed it off....never even changed the font from the default font...didn't even notice till I had it all assembled and thought...that doesn't look the best!  Oh, well...I'm not starting over!  Kraft stock from Papertrey Ink and the blue is just some AC stock.  A little twine and called it good!


Have I posted the card I sent you yet?  I'm thinking it was this one but I could be so wrong!  I do good to remember who I made a card for this week and which one it was....LOL...my friend Max got to see her card on the blog and I'd already forgot it was the one I made for her...by the time I hit 70, I won't know where I live!

Anyway, this card was simply made with circles that I filled in SDE and then cut them on the Cameo.  Cut out and layered up some flowers because I wanted them to be thicker like chipboard elements and then used my markers to color the edges to match the paper.   This card is pretty self explanatory!


This is my least favorite of all the cards I've done....I had this thought in my head that didn't come out as good as I envisioned and it took more time than any card I've done...I wanted the vase to look like it was filled with water and the stems were in the water behind the glass.  I wish I could say it worked but it really didn't.  Just looks like I parted the water and laid the stems in the gap.  Flowers were cut files from Silhouette, filled with pattern paper and then cut and layered up with buttons and twine.  Embossed the back panel wit dots and tied on a pretty gingham ribbon.


Halfway there....this is another card I made with the free kit I got in my card making magazine from Hunky Dory...called Flutterbye Wishes....I'm anxious to get this months kit cause we are suppose to get another free kit from Hunky Dory again...I really love them.  Every thing was from the kit except for the scalloped card base and I made that with the Silhouette.  Added a few rhinestones and a beautiful card was completed. 


Still with me?  I sure hope so! I'd been wanting to try one of these cards for quite some time and finally broke down and bought some of the clear cardstock from PaperTrey Ink...loved how it turned out but it was terribly hard to photograph so you could see the clear part.  The girl, tag, clouds, fence and butterflies are on the front of the clear stock card and then the scenery is printed on cardstock and attached to the top of the clear stock.  I scored the clear stock about an inch down from the top and then the scenery was fitted into the fold and the clear stock was glued on the back side.  I added another label to the inside on the scenery for the inside message and its hidden behind the front label.  It looks so much prettier in real life!  Rolled flowers, ribbon, rhinestones and glitter and then a bit of distress inks around the edges...I have to laugh...looking at it here, it looks like she is riding a bike with a flat front tire!


Another card I tried using the clear stock.  The white chevron was cut on the Silhouette and attached to the front of the clear stock.  The balloons and wish were cut files that I filled and cut on the cameo and then I just added pink cardstock to the inside. On this one, I had to do a whole cardstock card (out of the pink) so I would have a place to write the inside message...otherwise, it would have shown on the front and I wouldn't have liked that look!  Not the prettiest card but it was ok! This card shows why I prefer to cut my files out of colored stock.....I do not like white edges and I forgot to color the edges of the Wish with my markers..


I'd better put it in high gear...Bill is hollering for supper!  Ok...a card that started out as a birthday card and ended up a Sympathy card....didn't even have a need at the time but didn't think it looked too festive for a birthday card either.  This was a new technique I'd learned how to do by making a swing card. The paper is Every Day Kraft by the Paper Studio.  Some ribbon, a bit of Liquid Pearl on the flower, some black dots and a sentiment...I need to make up a few of these to keep on hand.The flower stamp came from Kerri Bradford.


Onward.....we are getting closer! Only 4 more to go today!  Not that I'm caught up but it will be all for this post.  This was made for my beautiful, sweet daughter.  It wasn't my idea, I found it on Pinterest and had to see if I could re-create it with the Silhouette.  The original poster had used a die but I don't own any so had to make my own cut in SDE. The cut file wasn't too hard to make but it was a bugger to figure out how to get it mounted to the front oft the card.  I finally just cut stripes of foam tape as narrow as I could so it wouldn't show behind the 'wire'...the butterfly is a Silhouette cut file and I used some new glimmer paper stock that I got from PaperTrey Ink...love the shine it has...both the white and the blue are glimmer papers. The yellow is plain.  She loved it, of course! 


I'm sure you are aware that August is a busy birthday month for me....Greg, Jack, Bella and Jerri Ann and then Bill and my anniversary....I had to have all these done before the grands came for their summer visit which falls during the first of the month.  This one coming up was for Bella....she is a cowgirl at heart...loves riding horses whenever she gets the chance.  The kit is called GiddyUp Cowgirl by Carta Bella...love this kit and have used it twice now....All I did was use the paper for fills on my shapes and layered it all up.  The tag came from the kit...I made the scallops and the horse/cowgirl shape, I have no idea!  I'm sure it was a cut file but I can't find it in the library so I don't think it was from Silhouette but it could be an svg file.  Again...I need to add notes to my files!  A little ribbon, a pretty pink resin flower and some fake stitching...


Next for the month was Greg, one of my hardest cards to come up with...I like pink and frill...not boring and manly...nothing spectacular....just cut some pattern paper and layered it on with an added button...


And the last card I will share today....birthday card for dear Jack...love doing cards for little ones...
The puppy and balloons are cut files from Rivka's Renditions and was purchased through the Silhouette Store.  Embossed the background with a large dot embossing folder, layered the pup and added the balloons and some colored twine for the strings.  I just cut a few 7's from cardstock and added them around the base.


That's all for now....hope you didn't go to sleep before you made it through....I hope to post the rest of them next week....about a dozen more to go!

Enjoy,

Pin It!

February 9, 2014

Snow Again


I haven't had a pair of boots for years and don't really like to wear them but Vickie got me this pair of duck shoes for Christmas and I love them. They have been put to good use this year with all the snow we have gotten and it's still coming down. I went out and did a little sweeping while Brent and a neighbor cleaned some of the neighborhood driveways off and help a car get out that was stuck in the snow. Going to stay in now and have a cup of coffee with a nice fire going and watch some of the Olympics with more snow.
Thanks for the warm shoes Vickie!
Pin It!

January 28, 2014

A Passing of a Lifetime

On this sunny but cold January morning, my dear sweet mother in law passed away in her sleep. Today she is re-united with the love of her life. I will miss her sweet disposition and kind words but I don't begrudge her the reunion that she has been waiting on for almost 23 years. There is rejoicing in heaven today! Bill and I went to visit her last Friday and I'm so glad we did...she was in good spirits and liked her 'new' home! We had just moved her from one nursing home to the one her daughter is in and they seemed to really like being together. Maybe that was all mom was waiting for...a chance to see her only girl one last time! I think she died in peace and I'm sure she had a smile on her face. Until we meet again, my sweet MIL....
Pin It!

January 21, 2014

It's been a long time

It's been so long since my last post I almost forget how.
The snow started falling sometime during the night but thankfully it's so  fine that we only have about 3 inches on the ground for now. Supposed to get more later today. Did the grocery shopping yesterday so now that the driveway and walks are cleaned off we can just stay inside and keep warm.
Brent did the shoveling not me I stayed inside and but dinner on. Just stepped out on the porch to snap these snowy shots.


A snap of a bench on the front porch.


Just a different focus spot.

I have finally gotten over Christmas and the crud that I had. Was sick for a week and then coughed my head off for another week was so sore from coughing it was hard to move.  Have all the Christmas decorations down and most of it is packed away I'm still trying to get it all organized to make it easier next year. I need to spend some time in the basement going through bins and getting rid of the stuff that I don't use anymore. I also have a bin of Halloween stuff that needs to go. I still don't have everything put back the way I had it before I started decorating for the holidays but I will.

Have started back on the 1200 a day just hope I can stick to it. One day at a time is all I can do.


Pin It!

LinkWithin

Related Posts Plugin for WordPress, Blogger...