February 27, 2013

Butterfly and Lace


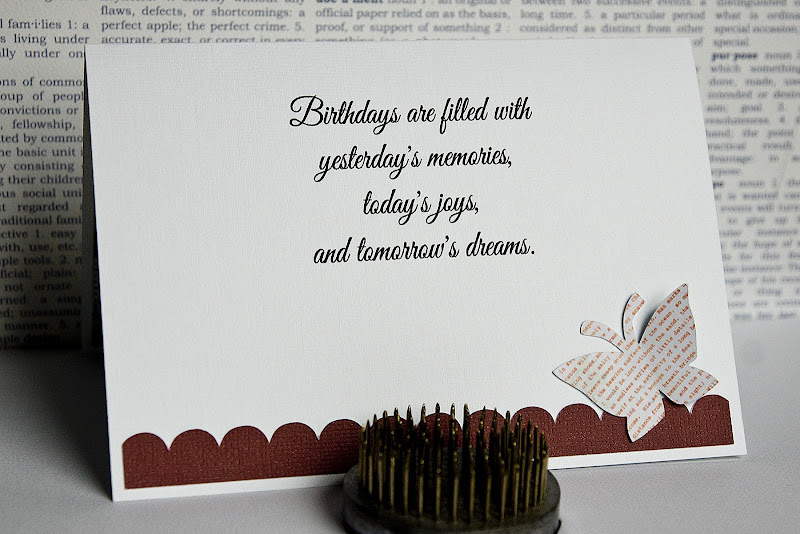
This is the card I designed for my niece and I had to hand deliver it because I got a little carried away with the box decorations.  The card is made with PaperTrey Inc white rustic cardstock, the gray and pink are AC cardstocks called Graphite and LipGloss.  The flower is a Silhouette cut by Lori Whitlock...how do you like the leaves?   I edged them with some Tim Holtz scattered straw distress ink and then used my Scor Pal to add the veins and then folded it a bit in the middle to give it some shape.  The pink flower was edged with Pink Cheeks Powder Puff chalk ink.  The lace came from my stash, the flowered print used on the banner tag is by Basic Grey called True Love and I just did a color match for the pink banner tag.  The paper used for the flower was also from True Love by Basic Grey.  The butterfly came from the clearance aisle at Michaels and was by K&Company.  The background paper is also by K&Company and was designed by Brenda Walton.  The pink pearls came from want2scrape.com.


The butterfly is another silhouette cut file by Hero Arts...I cut two and then added glitter glue to the bottom layer through the holes of the top layer.  Glued them together and added rhinestones from want2scrap.com.  The pink rhinestones are from there also.  The patterned paper matches the banner on the card and the pink twine came from Endless Inkabilities.  The box was designed by me in Silhouette Studio Designer Edition and fits a 4.75 x 6.75 card with an inch of room for big embellishments.  It could be mailed but not as it is decorated...LOL.....I added an extra layer to the top and bottom of the box for extra padding. ...

Pin It!

February 26, 2013

LOL....a breath of Spring my butt!

Just yesterday, my post title was a breath of Spring...now look at today!

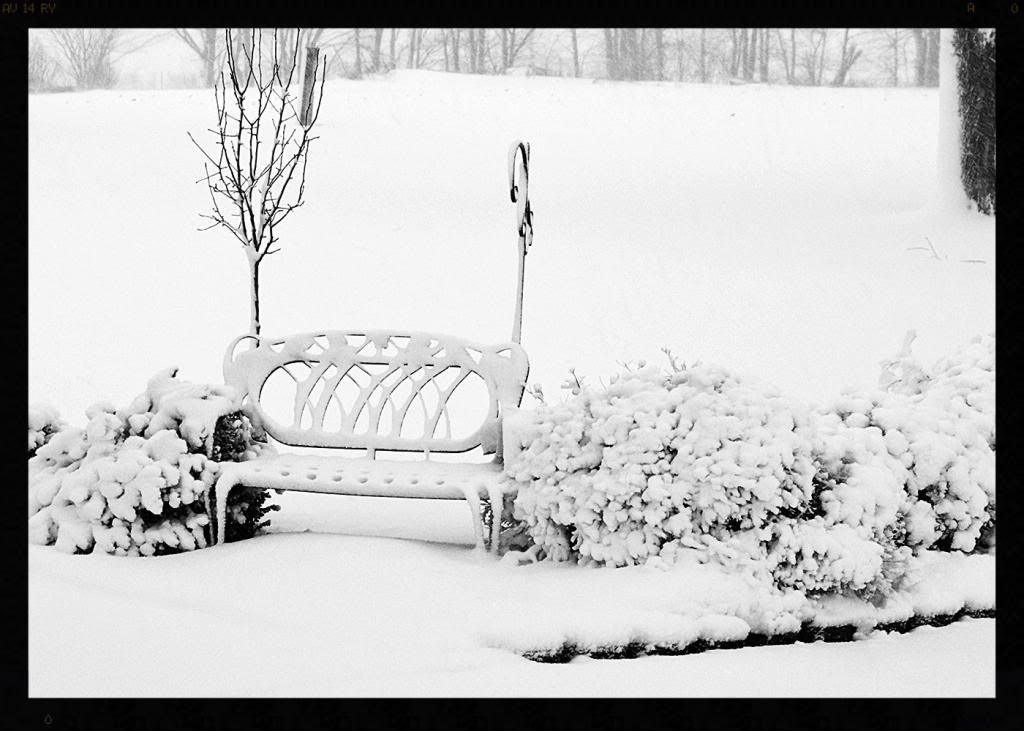
Has been snowing since about 3am and its still coming down.....I'd say we have about 5 inches so far...and the wind is starting to blow so I hope we don't lose power. 

....
Pin It!

February 25, 2013

A breath of Spring in February

My daughter surprised me this year with a Valentine gift...she called about 9:30 on Valentines day to inform me that she waited too late to get in on delivery service and that I needed to go to the flower shop to get my own gift...LOL....so typical of my daughter.....but it is beautiful and I've really enjoyed it these past few cold, snowy days!  I can see it on the table on the front porch this Spring...


Tomorrow, we will be buried under another fresh layer of snow....calling for 6 to 10 inches for us with high wind...looks like me and Leslie will be walking together for the next couple of days. I've been able to get out the last three mornings and its been beautiful walking....cool, sunshine and no wind!  I really loved the walks.  I'm down 13 1/2 pounds now...13 more to go to my goal!  It's not coming off at lighting speed but hopefully, this way, I'll be able to keep it off....Bill isn't even trying, he just gets to eat what I eat and he's lost about 8 or 9 pounds...his Endocrinologist will be tickled pink!....


Pin It!

February 23, 2013

Time Flies Birthday Card

Whew.....I think I'm caught up posting the projects I did before Valentines day....have another almost finished and need to start one tomorrow and then all I have left to do before March is Mom's birthday card.  Then in March, I have to make favors for a wedding, do Gavin's birthday stuff and do my TAXES!  Yuk.....I can handle the first two things but I hate doing taxes!

This card was made for my wonderful son-in-law....I designed this in SSDE.  The Time flies label and the numbers patterned paper came from the Online store and the paper was by Glitz design.  They have some really cool papers and I've purchased quite a few of them.  The twine is just some from my stash, which reminds me that I need to find some more as my stash is getting slim.  I cut the letters out on the Silhouette twice and doubled them up to give them more of a chipboard elements feel.  I have a Quickie Glue pen and it works great for those little delicate elements.  The buttons came from Wally World.....I can't get great stuff from their craft section but I can get the basic stuff.  I'd give anything to have a Michaels or JoAnn's close by...well, maybe not...I'd be broke all the time...LOL

When I decided on the design for this card, I knew I wanted to use numbers and didn't think I had anything like that, so I went in search on Etsy (my favorite spot to find digital paper) and found some I liked a lot because his age was one of the numbers in the paper and I was going to put a circle of some kind on that number...but, as always, the file didn't come to me until Monday and I HAD to finish and deliver the card on Sunday...story of my life, always a day late!  I ordered some other paper that I just liked and it came to me instantly but not the one I REALLY needed.


I've worked all afternoon on a box for my 5 x 7 cards....every time I sent it to the cutter, thinking I had it figured out, it would be just a tad off, or I forgot to add the half circles to make it easier to open, or I forgot to add all the score lines or.....you got the drift, right?  I did finally get it all done and it fits like a glove.  Most of the time, I can keep my card 'depth' to 1/4 of a inch but when I add flowers, it seems to jump the 'depth' up to 1/2 inch or more and they don't fit in my 1/4 envelope or any envelope, for that matter.  So...I decided I needed a card box and set about to make one.  I learned a few new things in Studio but probably can't remember how I did them when I want to do it again...LOL...at least, this box file has been saved!

We ended up with 7.2 inches of snow and they are calling for 8 to 10 coming in late tomorrow night...I LOVE snow!  Especially, the really deep kind!  

Sorry, I'm rambling!

Enjoy!....

Pin It!

February 22, 2013

Western Style Birthday Card

I have a super good and long friend that enjoys horses more than people...LOL....so, I tried to come up with something kind of horsing...thus the stirrups on the card.  This card layout was 'borrowed' from this wonderful gal...Peanutbee...I don't know her real name and this link just takes you to the card in the Splitcoast Stampers gallery so I don't know if she has a blog or not.

The paper is from a kit I've had forever called Portobello Road by Recollections.  I really think it was the very first paper pad I ever bought...just can't get myself to use the paper...LOL....

I made the layout in SSDE and then just cut it on the Cameo.   As you can see, I finally did some actual sewing on this card and it worked pretty good...finally figured out my tension was a bit off on the machine and after adjusting, it sews much, much better.  The big rhinestones came in a pack from My Craft Channel with a bunch of other stuff but I don't know who it was by.  It's not marked on the pack. The second image is just to show the matching envelope that I made for the thicker cards.


Enjoy!


.....
Pin It!

February 21, 2013

The last of the Valentines!

These next three images are the Valentine treats I sent up to the kids in the north.  This first one is the purse I made for Bella and Amanda and they each got a notepad and pen, a little felt animal sewing kit and a chocolate bar.  It fit nice and snug but I had to take the sewing kit out of its original packaging in order to get it in the purse.  The purse is a cut file by Samantha Walker and was not the easiest to put together.  I don't have any glue that dries super quick and you have to shape the round top and glue these little glue tabs all around it....my patience wore a little bit thin...LOL...

Anyway, I imported the paper to SSDE (Silhouette Studio Designer Edition) and then filled my shapes and sent it to print and cut.  Glued it all together and then cut the lace heart and smaller hearts and layered them together and added glitter to the top heart.  If I did it again, I'd have made the white handle red but again, I was running out of time.  The ribbon is just some I picked up at Wal-Mart.  The patterned paper is by Sassy Designs.

You've seen this next image but I wanted to post it again so you could see how cute the little girl monkey is with her bow in her hair.  I added liquid pearl to the bow.

And, last but not least....a bag tag for my little man....the bag held some little play vehicles.  The Valentine monster cut came from the Silhouette Online store and was designed by Jennifer Wambach.  The digital paper is from Sassy Designs.  The googles eyes are some I've had forever in my stash. 


We are in a super bad snowstorm....it started in KC at 7:00 this morning and they've already picked up 8 inches and expect at least 10 to 12 inches.  It's just now starting here and accumulating quickly....when I started writing this post, it wasn't doing a thing and now (45 mins. later) the ground is starting to get white and the wind is howling!  We are expecting 8 to 10 before it quits.  And then, super cold for the whole weekend.  Looks like a good time to stay in and enjoy a movie or two!  I got out early this morning and did the weekly grocery shopping, so we won't have to get out for that.  Schools, state offices and other businesses closed this morning before it had even started snowing, all over central to north Missouri.  Our channel nine and channel five stations (both KC stations) have not even left the news for regular broadcast stations.  They have just stayed reporting..I didn't even get to watch my Good Morning America!  Just heard that most all major interstates in KC are now closed down and the plows can't move because there are so many stuck vehicles on the highways...what a mess!

I hope its run out of steam before it gets to you!

.....
Pin It!

February 20, 2013

Disney Cars Birthday Bag and Card


My great nephew turned one this month and we celebrated it with a birthday party.  His theme was from the Disney Cars Movie so I had to make his card and gift bag to match.  I was fortunate to find a car online that printed out great!  I figured I'd end up having to find a book and scan it in but didn't and I was glad cause as usual, I was running behind....I'm such a horrible procrastinator!


I knew I wanted it to be bright colors for this cute lil' guys first birthday, so did it all in primary colors.

Here is the card...all done on the Silhouette and printed on Epson Presentation Paper for the brightness and saturated colors.  I made the flag myself and used a pattern that came with the Designer Edition Software for the black and white checks.


The lettering cut just fine, so that was wonderful....I've had troubles cutting little lettering before but I used a new blade and a new mat and that seemed to help. I cut the Happy 1st Birthday out and then backed it with an offset cutout of the words to make it show up better on the checked background.  I made the stop sign in the software and added black rhinestones under the name.  Not much I can tell about this card as it was all just pick a color, fill a shape and cut and adhere...the only thing special I used was the car clipart.  And, yes, I know I didn't quite get that red rectangle even with the yellow and blue....dang it!

Next up is the bag..I purchased a white bag from the Dollar Store and printed the black and white checks out on the Epson Presentation paper and then printed the car, more flags and the wording and cut it all out on the Silhouette.  I thought it all turned out cute and bright enough to catch the eye of a little 1 year old boy!
This is not the best picture as it was dark and I should have been on the road instead of taking photos...LOL


I told you I'd been busy...LOL...still have a couple more to share and a couple more in the making right now.

....
Pin It!

February 19, 2013

Coconut Velvet Fudge Cake


This is what's on the menu for dessert this week....I thought it was so pretty I had to post a photo of it before I baked it.  This is a JoAnn Lund recipe and I'll post the recipe after the photos.


The next photo is the finished product....and yes, it does taste as good as it looks except for one little mistake I made...I cooked it in a glass cake pan, so I reduced the oven temperature to 325 degrees and cooked it for the whole 35 minutes.  To both of us, we thought it was a tad on the dry side and when I fix it again, I'll take it out at the 30 minutes or maybe even a few seconds before. It didn't take away from the flavor though....we woofed it right down.


And here is the recipe, as promised!

Coconut Velvet Fudge Cake

1 1/2 Cups Bisquick Reduced Fat Baking Mix
1/3 Cup unsweetened cocoa
1/2 Cup Splenda Granulars
3 Tablespoons Land O Lakes no-fat sour cream
3/4 Cup skim milk
1 egg or equivalent in egg substitute (I used the substitute)
1 Teaspoon coconut extract
1/4 Cup (1 ounce) chopped walnuts
1/4 Cup mini chocolate chips
1/4 Cup flaked coconut

Preheat oven to 350 degrees. Spray a 9-inch round cake pan with butter-flavored cooking spray.  In a large bowl, combine baking mix, cocoa and Splenda.  Add sour cream, skim milk, egg, and coconut extract. Mix gently to combine. Spread batter in prepared cake pan. Evenly sprinkle walnuts, chocolate chips, and coconut over top. Bake for 30 to 35 minutes.  Place cake pan on a wire rack and let set for at least 10 minutes.  Cut into 8 wedges.


170 calories, 6 grams Fat, 5 grams Protein, 24 grams Carbohydrates, 290 mg Sodium, 66 mg Calcium, 2 grams fiber.

This freezes well!

....
Pin It!

February 18, 2013

Valentine to my Love


This is the Valentine I made for Bill....I saw something similar in the card section at the store and wanted to copy it with the Silhouette.  The white is done with a gel pen in the Silhouette and the I cut the LOVE and YOU.  It was pretty intricate cutting the white for the red LOVE and even more intricate trying to glue it on straight...as you can see, I didn't do too good of a job of that process...I then glittered up the y heart and u and attached the LOVE and heart with foam dimensionals.  The white border was done with a glue pen too but I did it by hand with a ruler....when I tried doing it on the Silhouette, it would smear when the blade was moving back into the home position.  The pen works fair but it doesn't do a really neat job with small print.  Maybe if you were doing larger print,or making a scroll or filigree, it would look great . I haven't tried that yet.

.....
Pin It!

February 17, 2013

Butterflies and Birthdays

This is the card I made for my dear friend, Maxine.  She called after she got it to thank me and was really impressed with my so called talent...LOL....I do have to admit, I did like it once it was all done.

Anyway, I'm posting 4 images of it...this first image is of the card front.  Again, I made this all in the Silhouette Studio Designer edition and the paper was imported and then cut to the shapes and sizes for the card.

The paper is from Authentique and the collection is called, Fresh...I love the softness of the colors!


The ribbon is from Celebrate It and I purchased it from Michaels.  The pearls and rhinestones came from Want2Scrap.  All the shapes came from the Silhouette Online store and my 'stitching' was done with a white gel pen.  The butterflies were printed and cut twice and then glued together for dimention and everything was sponged with blue chalk ink that I bought from My Craft Channel.

This next image is the inside of the card.


I got the sentiment off a greeting card site but can't remember the web address.

And this next two images are my pride and joy!  I finally figured out how to make a cut file for the envelope to fit these cards.  The card above is 4.75 x 6.75 and the envelope is 5 x 7 with a depth of 1/4 inch.  This way, the bulky card doesn't get 'smashed' into an envelope and it protects it during the mailing process.  It's cut out of a 12 x 12 sheet of cardstock and then I print and cut a liner for the inside.  Glued together with score tape and its finished.  I didn't decorated the outside but the next time I plan on doing that to match the card.

This first image is to show the 'depth' of the envelope and the second image shows the card inside of the envelope all ready to be sealed and mailed.  This ups my postage to $1.12 per card but it ensures that the recipient  receives their card in excellent shape.  I know some folks complain about having to pay more for postage but after working on a card for a full day I don't hesitate to pay the extra!


This is my favorite size card to make but I plan on making a cut file for the smaller cards too. 

Hope you enjoy this one!

.....
Pin It!

February 16, 2013

Valentine Treats 2013


Moving on.....these are the treats I made for Gavin's classmates.  This will probably be the last year as he moves to Junior High next year and the parties will end.  I'm going to miss doing it..

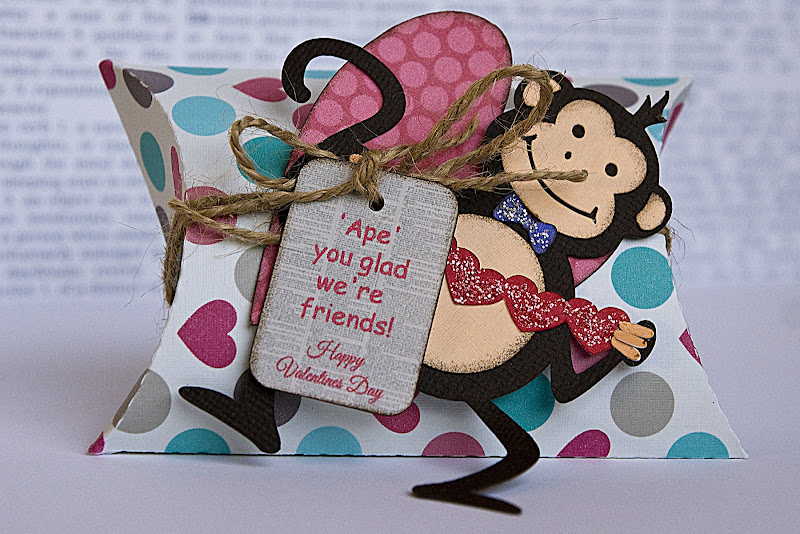
The monkey is a Silhouette cut...the bowtie is supposed to be a hair bow in the 'she' monkeys hair but I wanted it to be from Gavin, so decided to use it as a bowtie instead.  The pillow box is another Silhouette cut and the paper for it is from a digital kit called Sweet Valentine that I purchased off Etsy. The heart paper is from a digital kit called Everyone Loves Christmas and the script paper is from a kit called This and That.
I added distress ink around the monkey to give him a 'hairy' look and then glittered the hearts and bowtie.
Those tiny, tiny fingers were a bugger to attach and I debated on leaving them off.

I learned from another crafter that if you add an offset to all your cuts in the same color/pattern as the real cut and then set it to no cut, you avoid any white border that sometimes gets left if your print and cut is just a tad off....I was super glad to learn this cause I was using scissors to 'trim' up the cuts that didn't quite make the grade.

....
Pin It!

February 14, 2013

Tractor Birthday for Boys or Men


Tracer is really big into tractors....he can tell you the models of most all of them when he sees one on the road.  It won't surprise me if he ends up being a farmer.

This whole card was designed and cut with the Silhouette.  The tractor came from the online store and was made by Cali Arroyo.  The button came from Teresa Collings, Every Day Moments.  Same with the twine.
The paper was from Teresa Colllings Every Day Moments and imported into Studio to fill the shapes. I've completely forgot where the celeron and green paper came from but will post when I remember.

Off for my walk!

.....
Pin It!

February 11, 2013

A favorite snack

Mandarin Orange

This is one of my favorite snack for right now. Of course I still love most all other fruits and vegetables too but this is so good and easy to grab. Like to store them in the garage so they stay nice and cold.
Pin It!

February 5, 2013

Valentine Tray


May photo tray done over for Valentine's Day. Not my best Silhouette work or my best photography work either. I see that some of the letters are crooked. I just didn't take the time to measure and make off placement of all the letters. Got a little lazy and it shows.....LOL

As far as the photography the red isn't right not sure if it is because of all the light reflecting off the snow or what. But it will have to do. I'll try to do better on Easter.

Pin It!

February 4, 2013

Dinner tonight

4 x 6  Recipe Card

This is what we had for dinner tonight along with biscuits and rice pudding. I didn't have any beef or chicken stock on hand so I just used water and a little Kitchen Bouquet. It was perfect dinner to enjoy as we watched the snow fall outside. We have 4 or 5 inches on the ground so far and it's still coming down.
Made the rice pudding from leftover rice from last nights Mandarin Orange Chicken. I didn't have any raisins but I did have dried Cranberries worked just fine. I'm always out of something but can generally find a substitute. Doesn't always work but most of the time it turns out fine and every once in awhile it's turns out better.

Enjoy the recipe card. Paper and elements from Shabby Princess.
Pin It!

February 2, 2013

Outside my window


This was looking at me while I was trying to watch the WV basketball game. I think this is a Vesper Sparrow. Love that snow on the beak.


Used my  70 / 300 lens so I could get a good close up shot. I like the shot but I lost the snow in the background. Still snowing and the wind is blowing. Good old winter day.

Did you notice? I put a new header up. Didn't change it much just made the striped strip longer. It didn't look balanced to me before.
Pin It!

LinkWithin

Related Posts Plugin for WordPress, Blogger...